Advanced Mechatronics Guitar Design
OVERVIEW
This electric guitar project took up most of the semester in the Advanced Mechatronics class, as it perfectly combined design, mechanical fabrication, programming, and electrical engineering. It was one of the most challenging yet rewarding projects I have worked on!
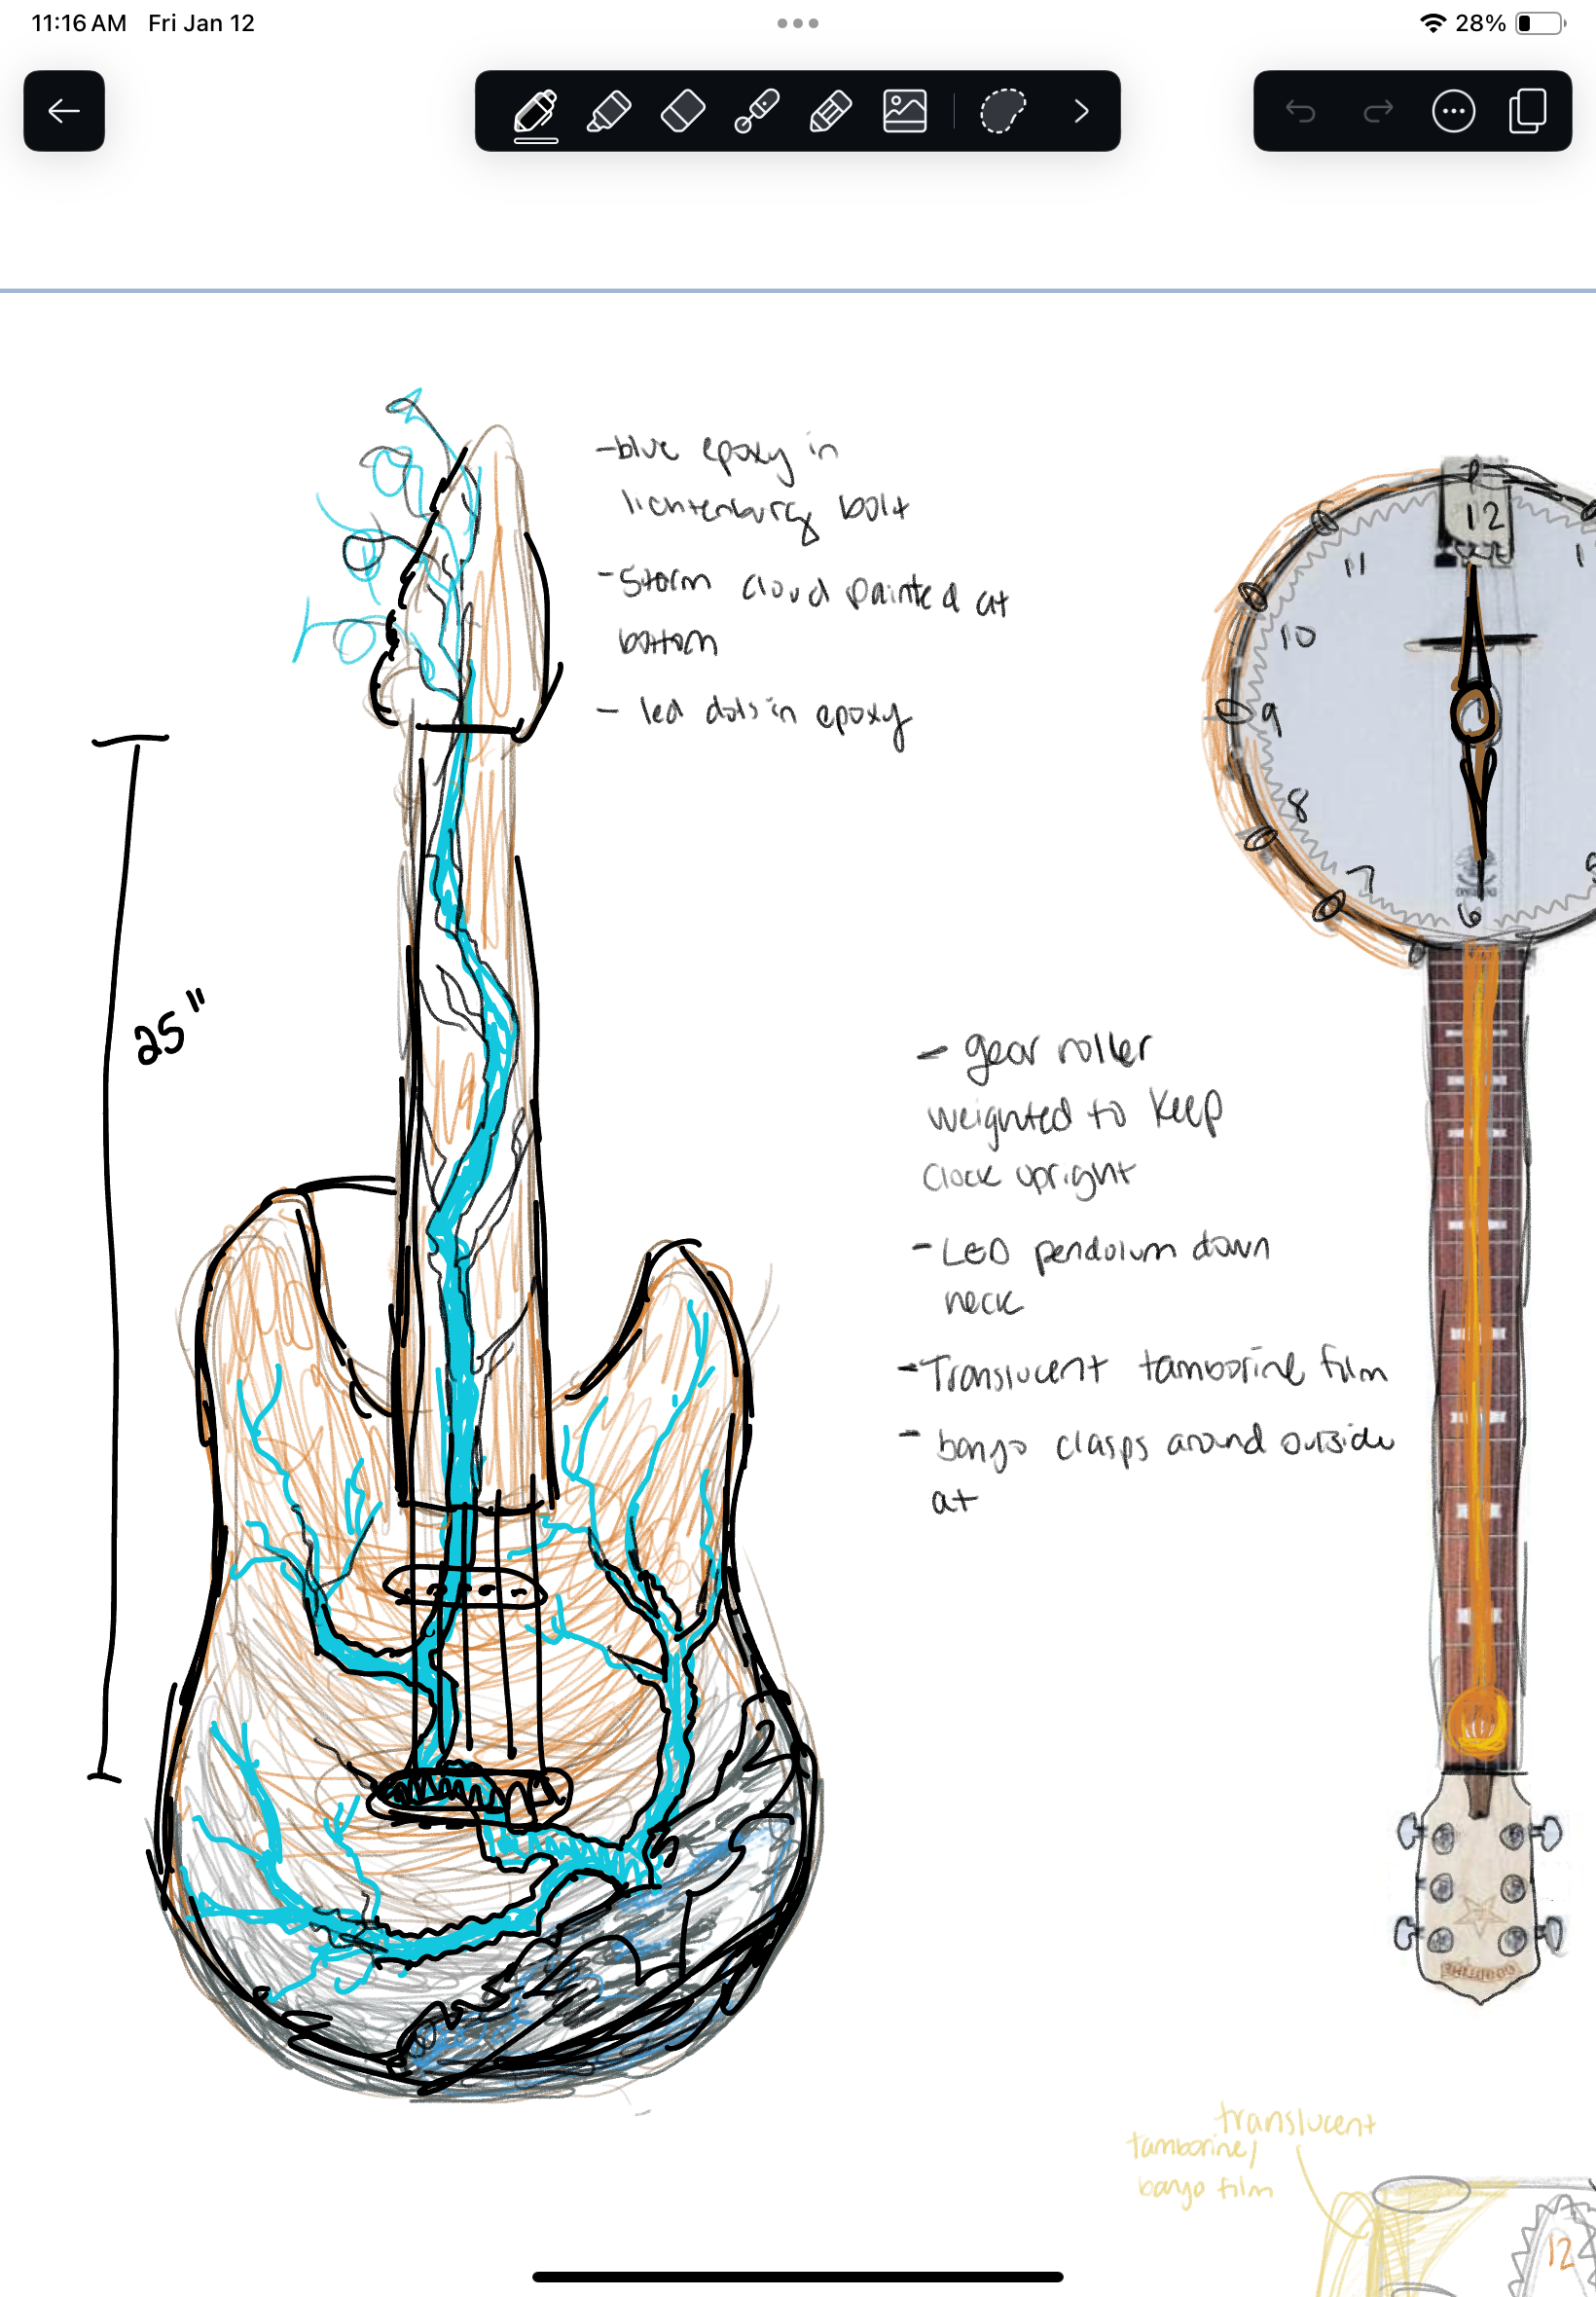
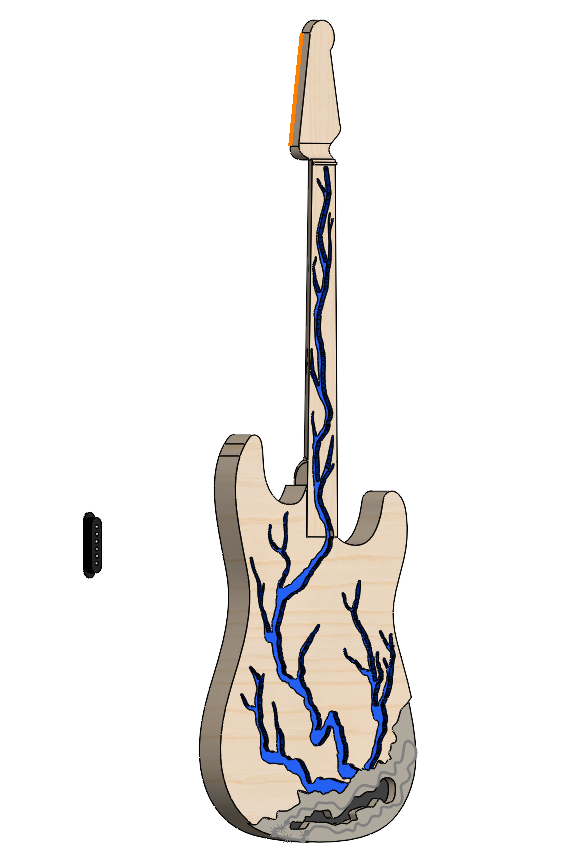
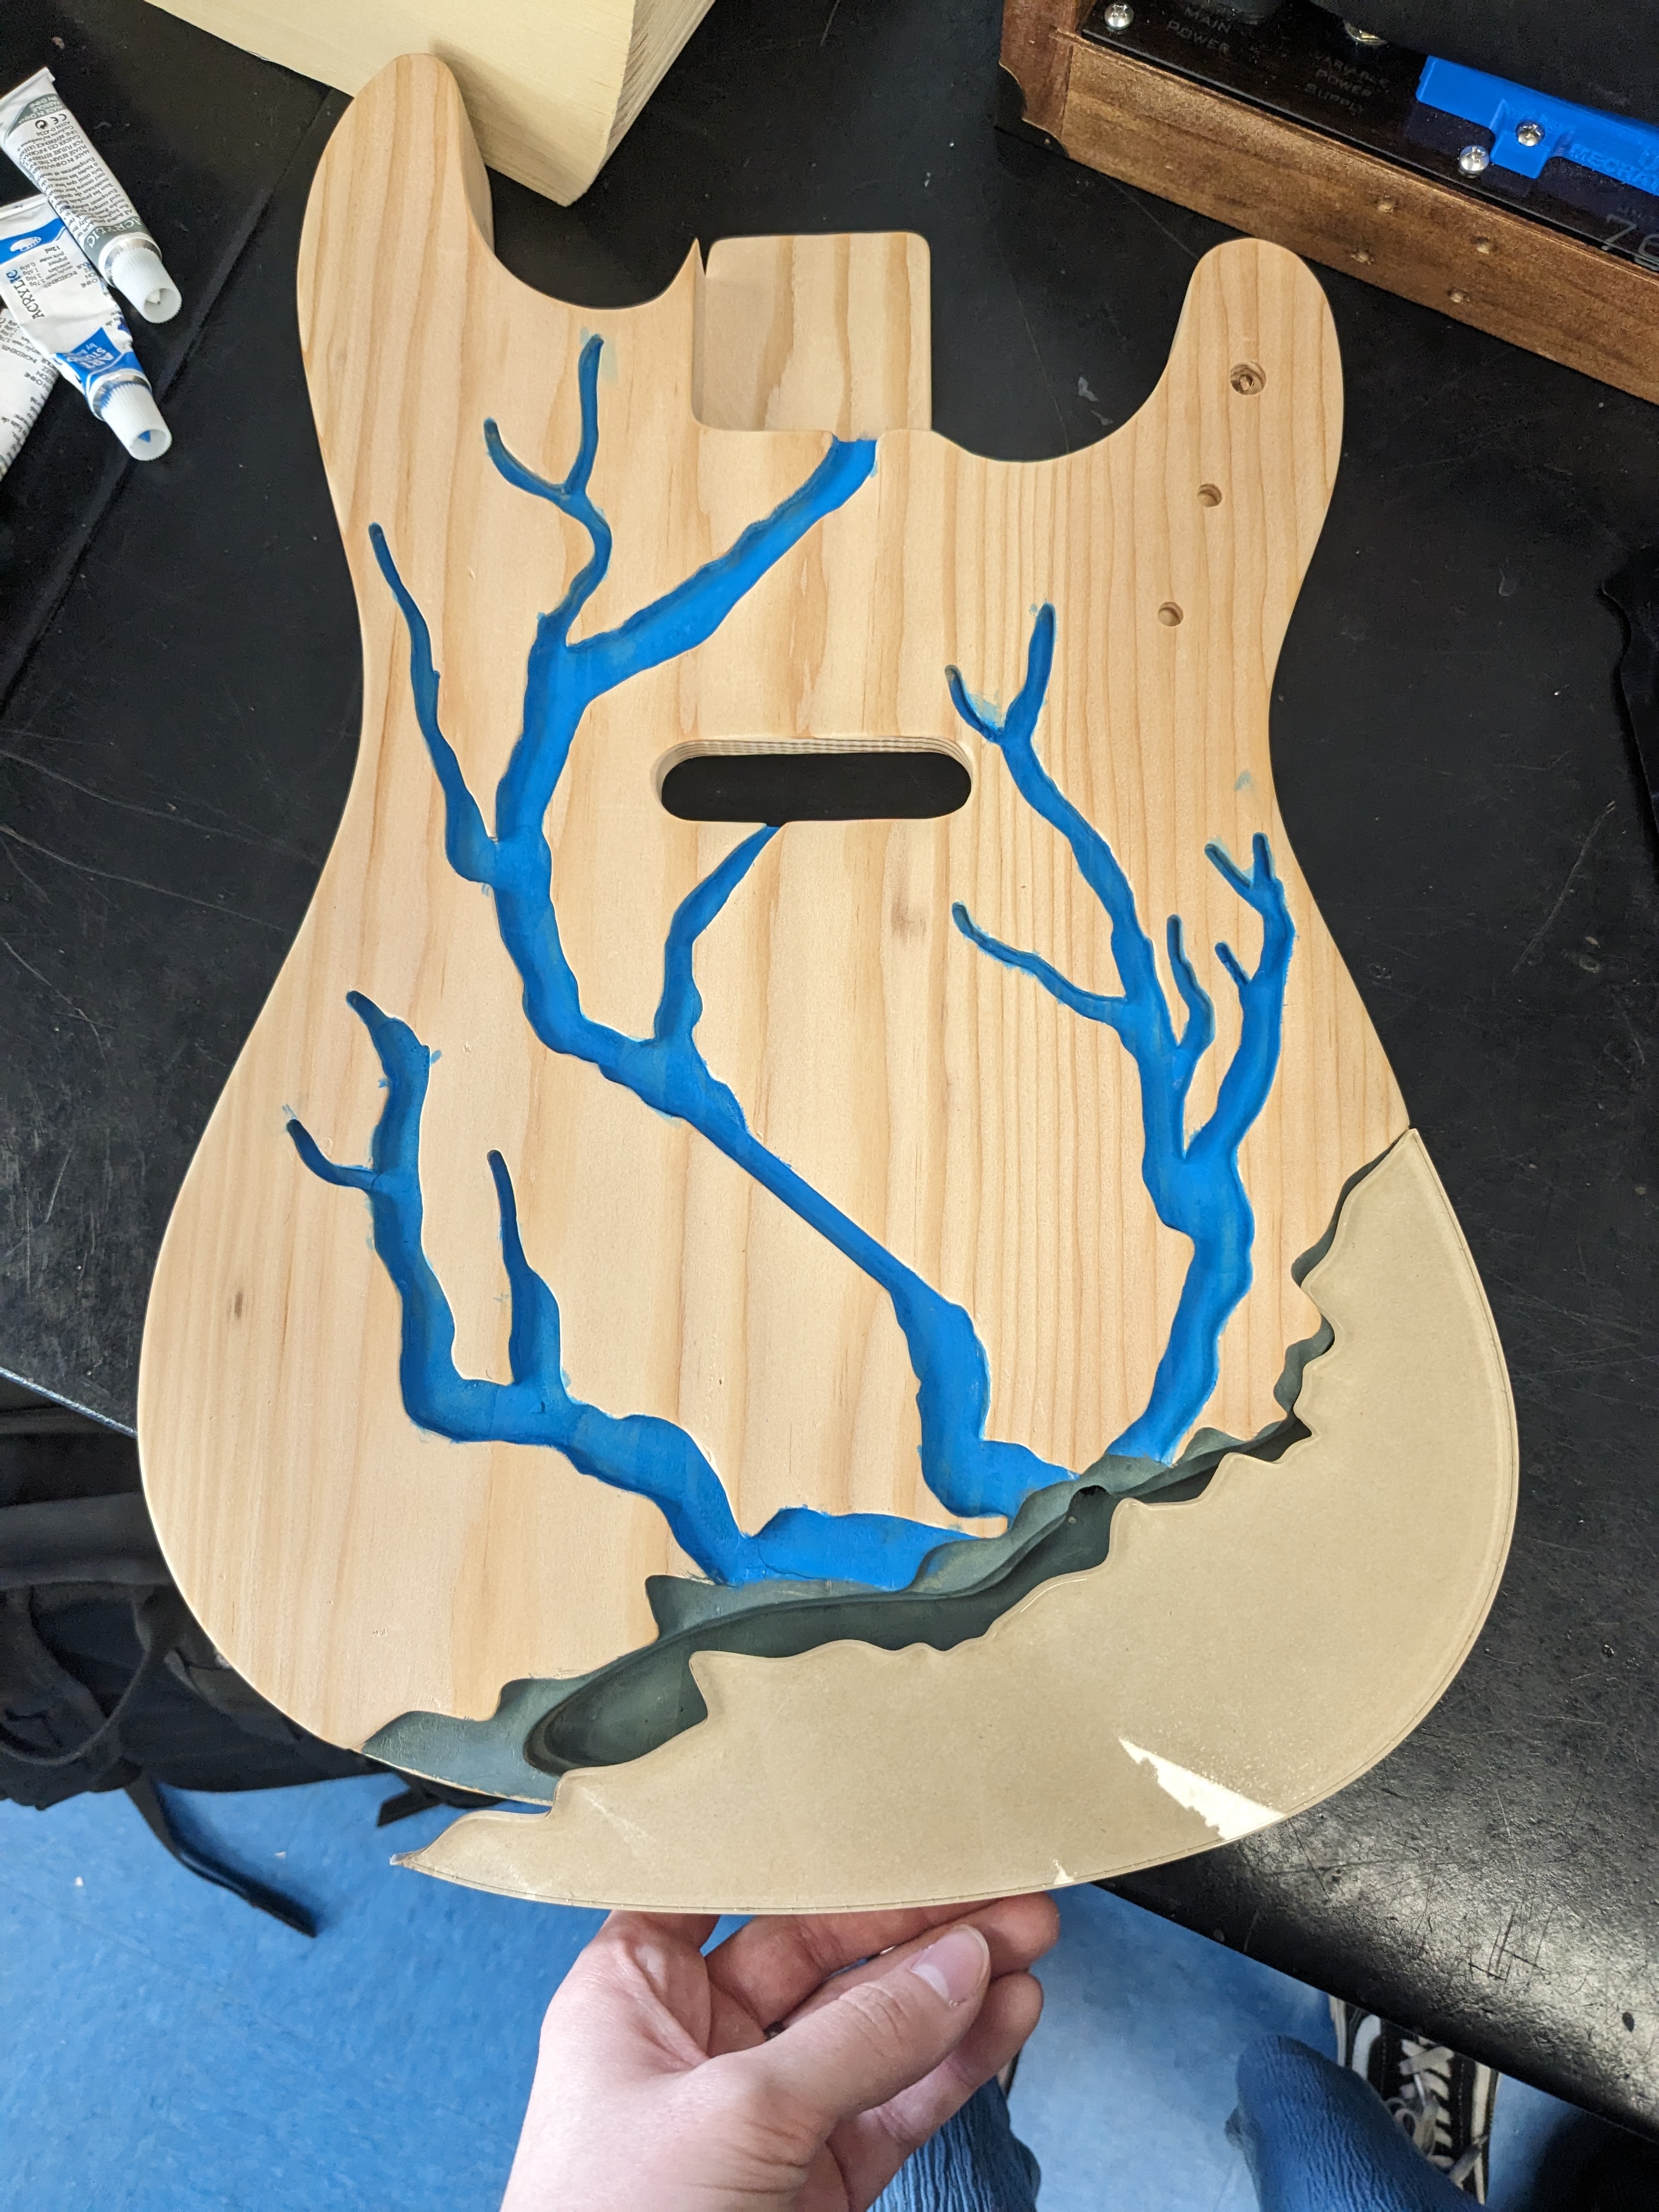
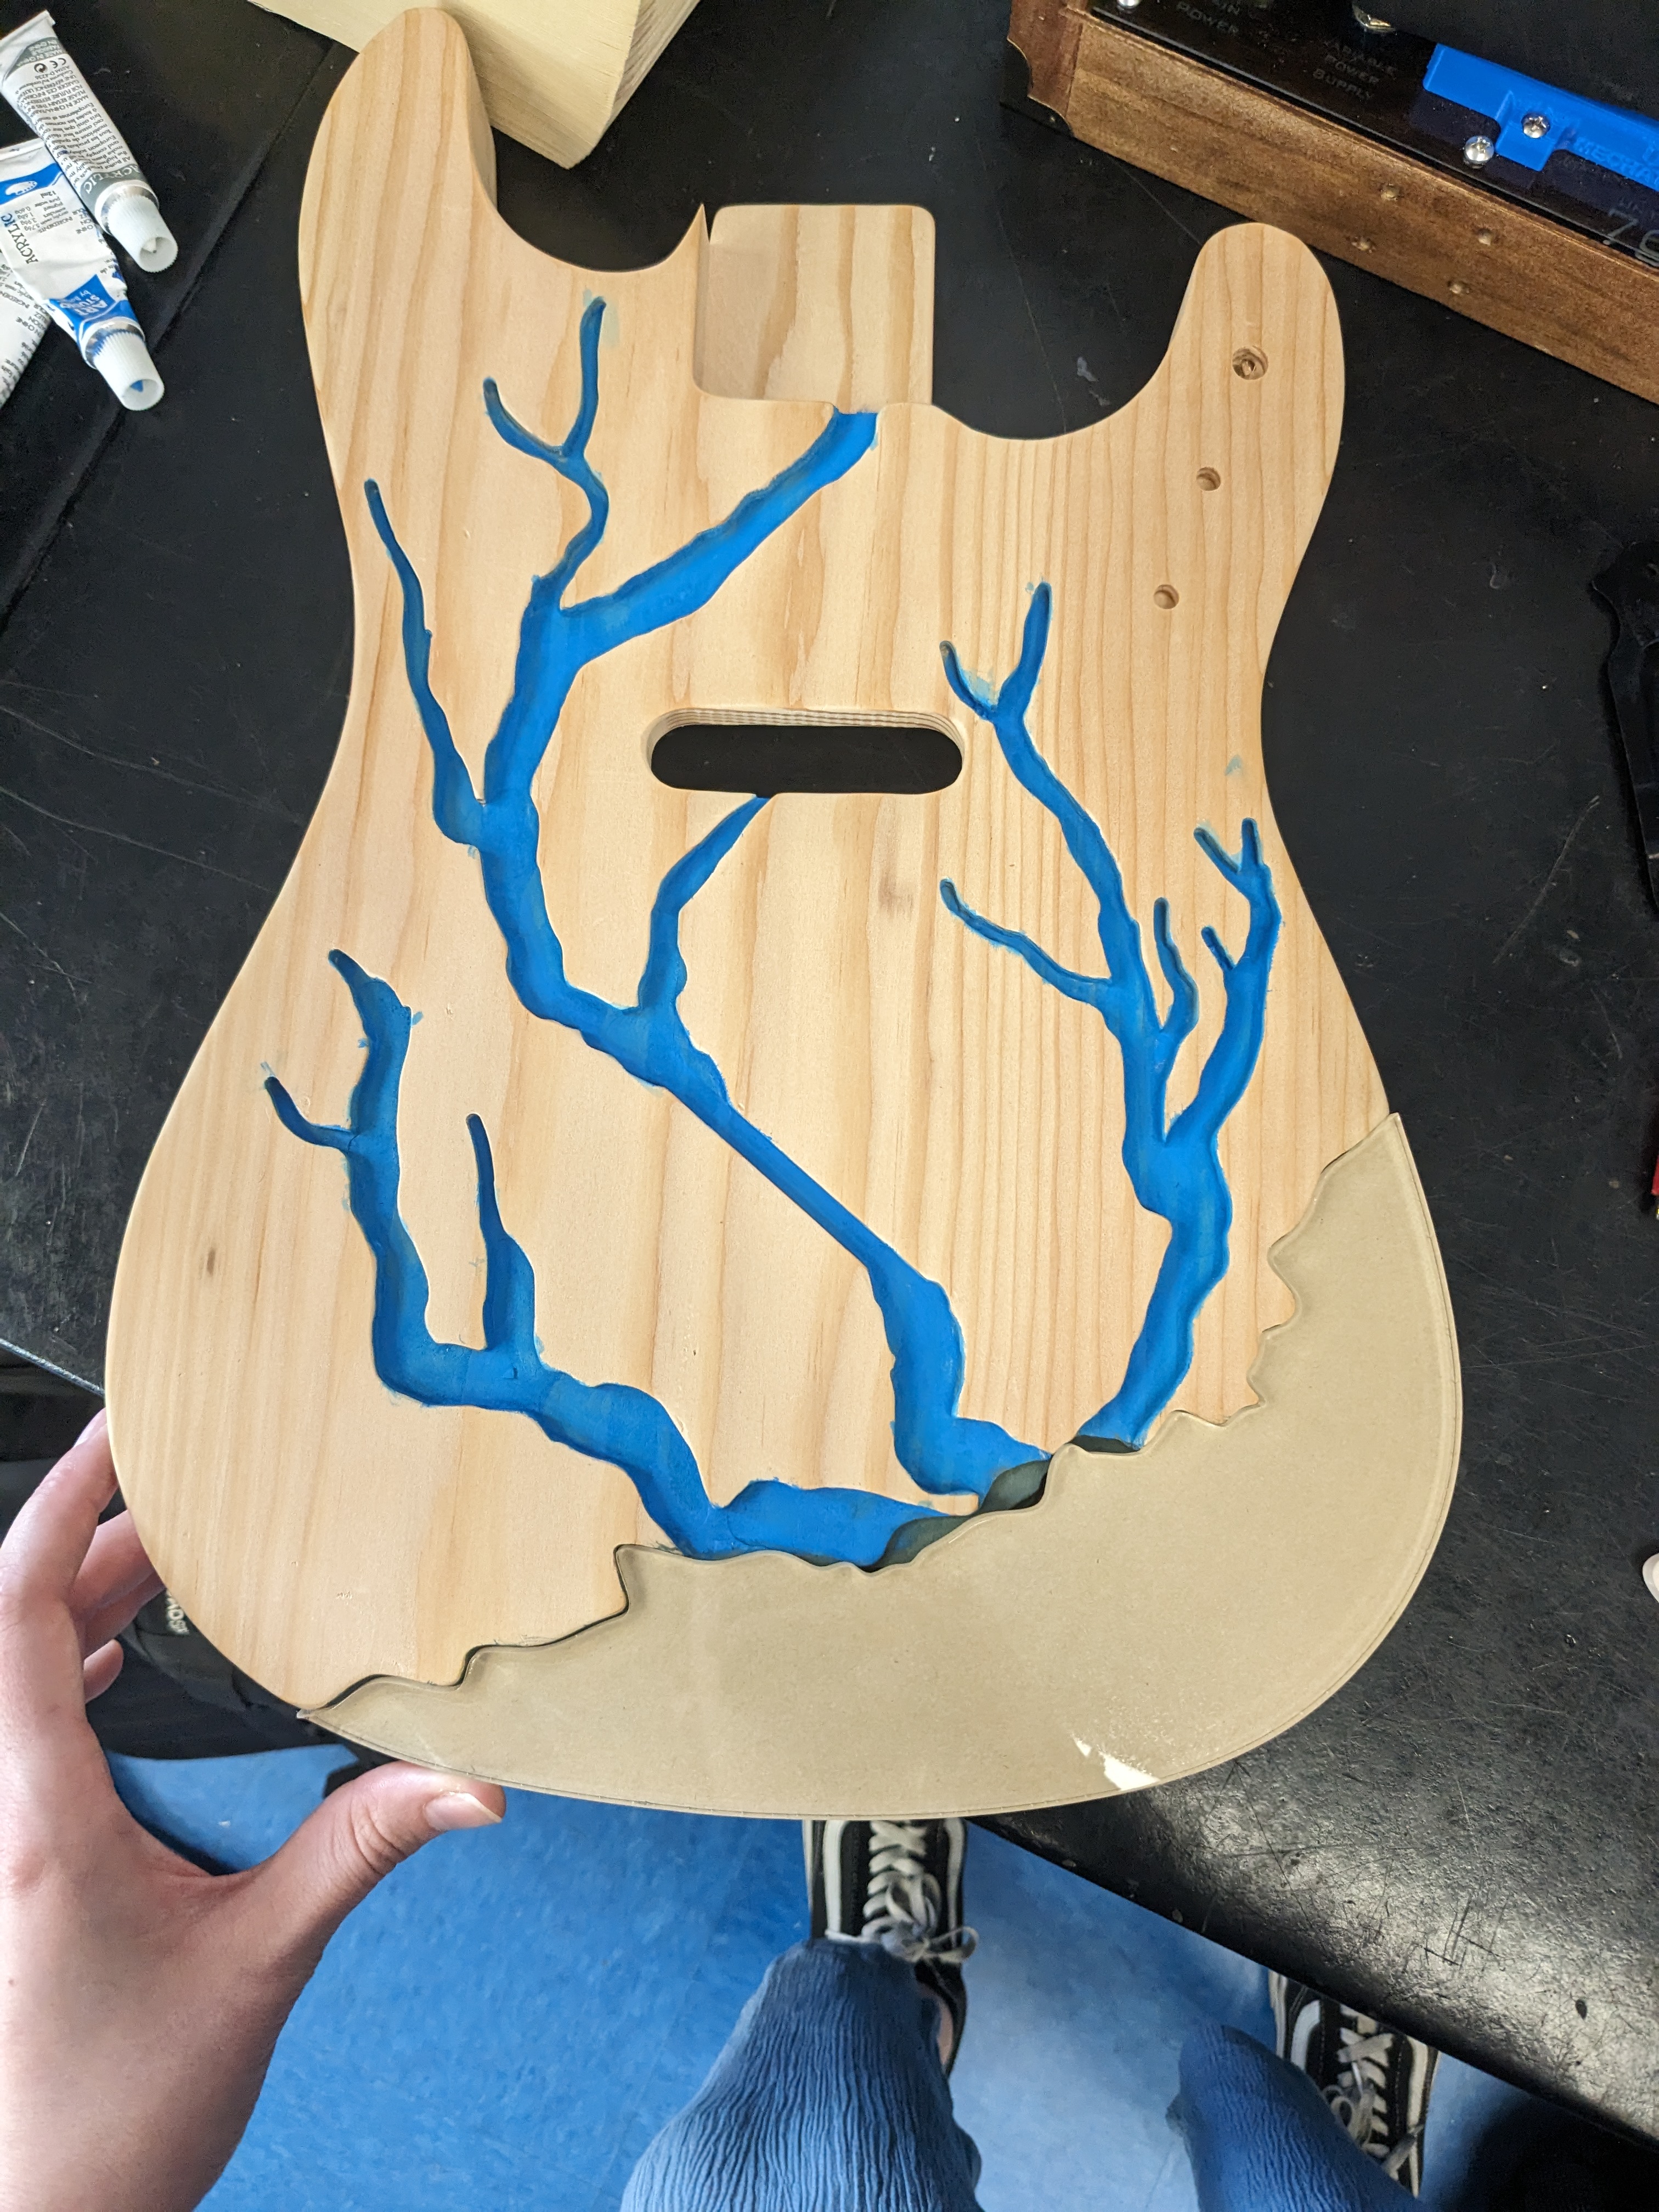
The first step in this process was to decide on a design for a guitar. I had an idea of doing an ACDC thunderstruck guitar where the guitar’s body was a cloud and the lighting shot up the neck. Our group even brainstormed about possibly making our own Lichtenberg wood burning to etch actual electricity into the neck using the tranformer from a microwave. We decided against this for a few reasons, the main two being that it was quite dangerous and the lightning pattern would not be controllable along the neck.
So instead I drew the lightning and guitar design on my Ipad and then exported it as a drawing file and then traced that drawing onto the neck surface in Solidworks
CAM and CNC machining
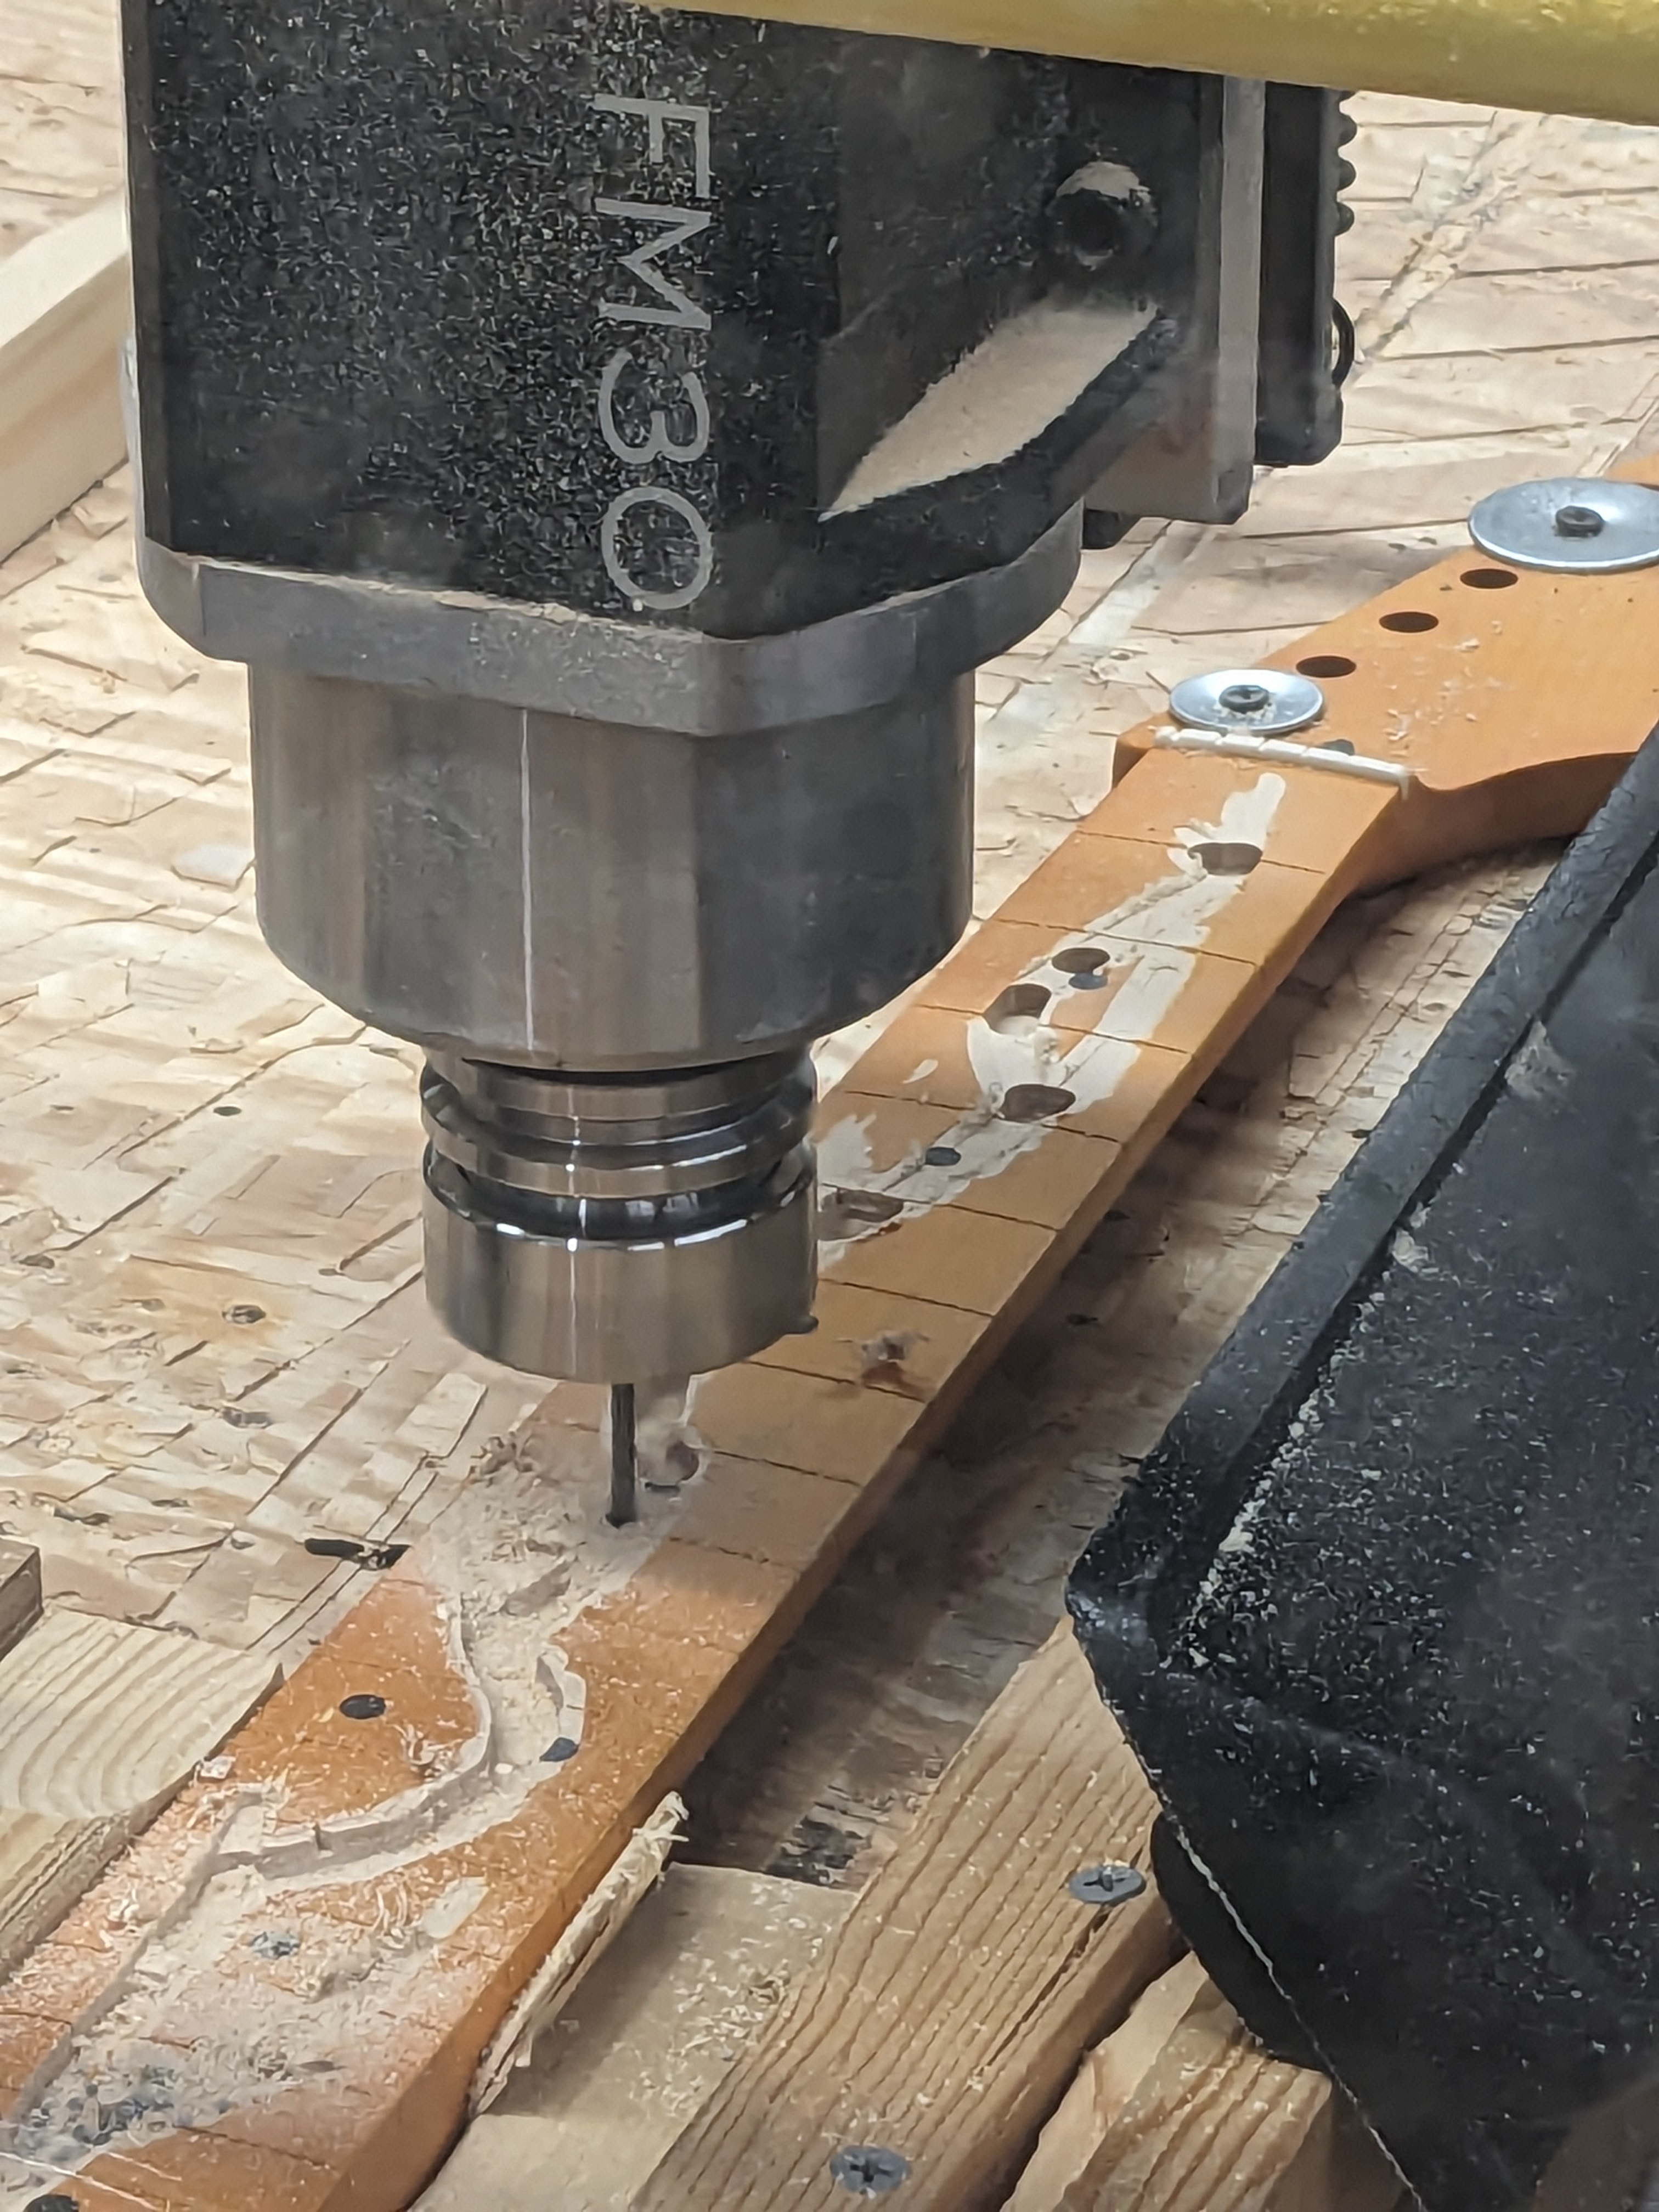
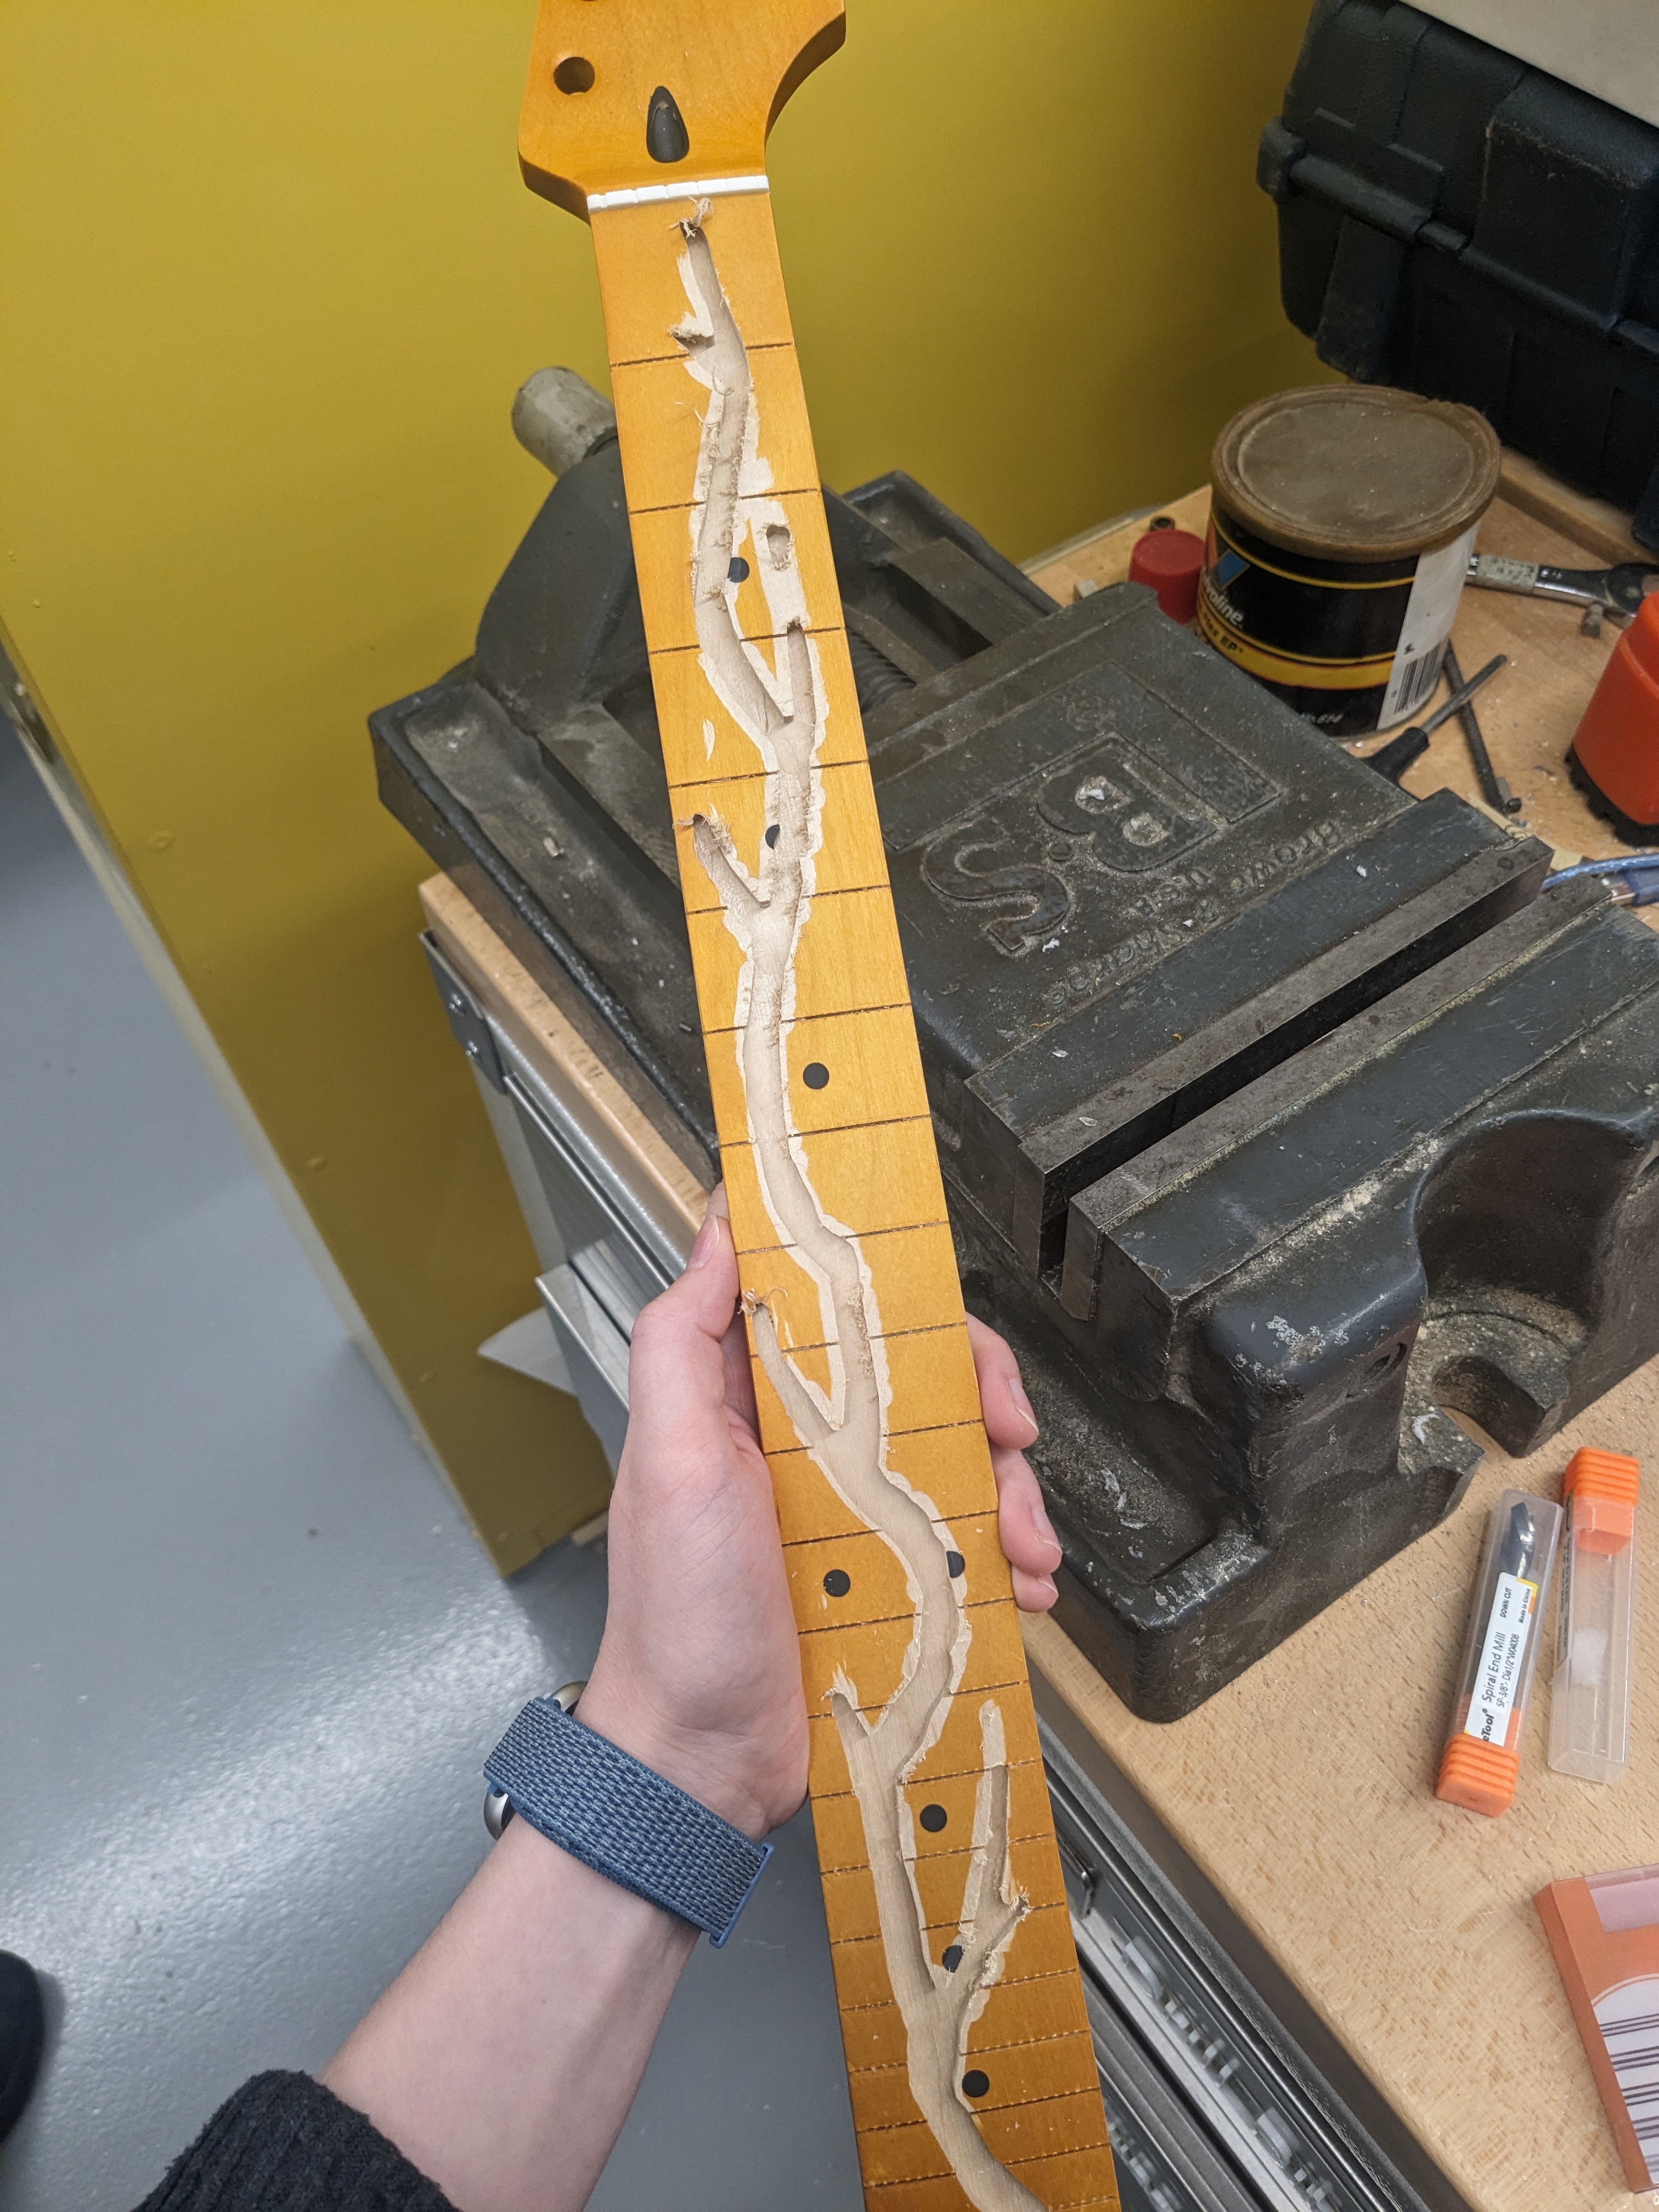
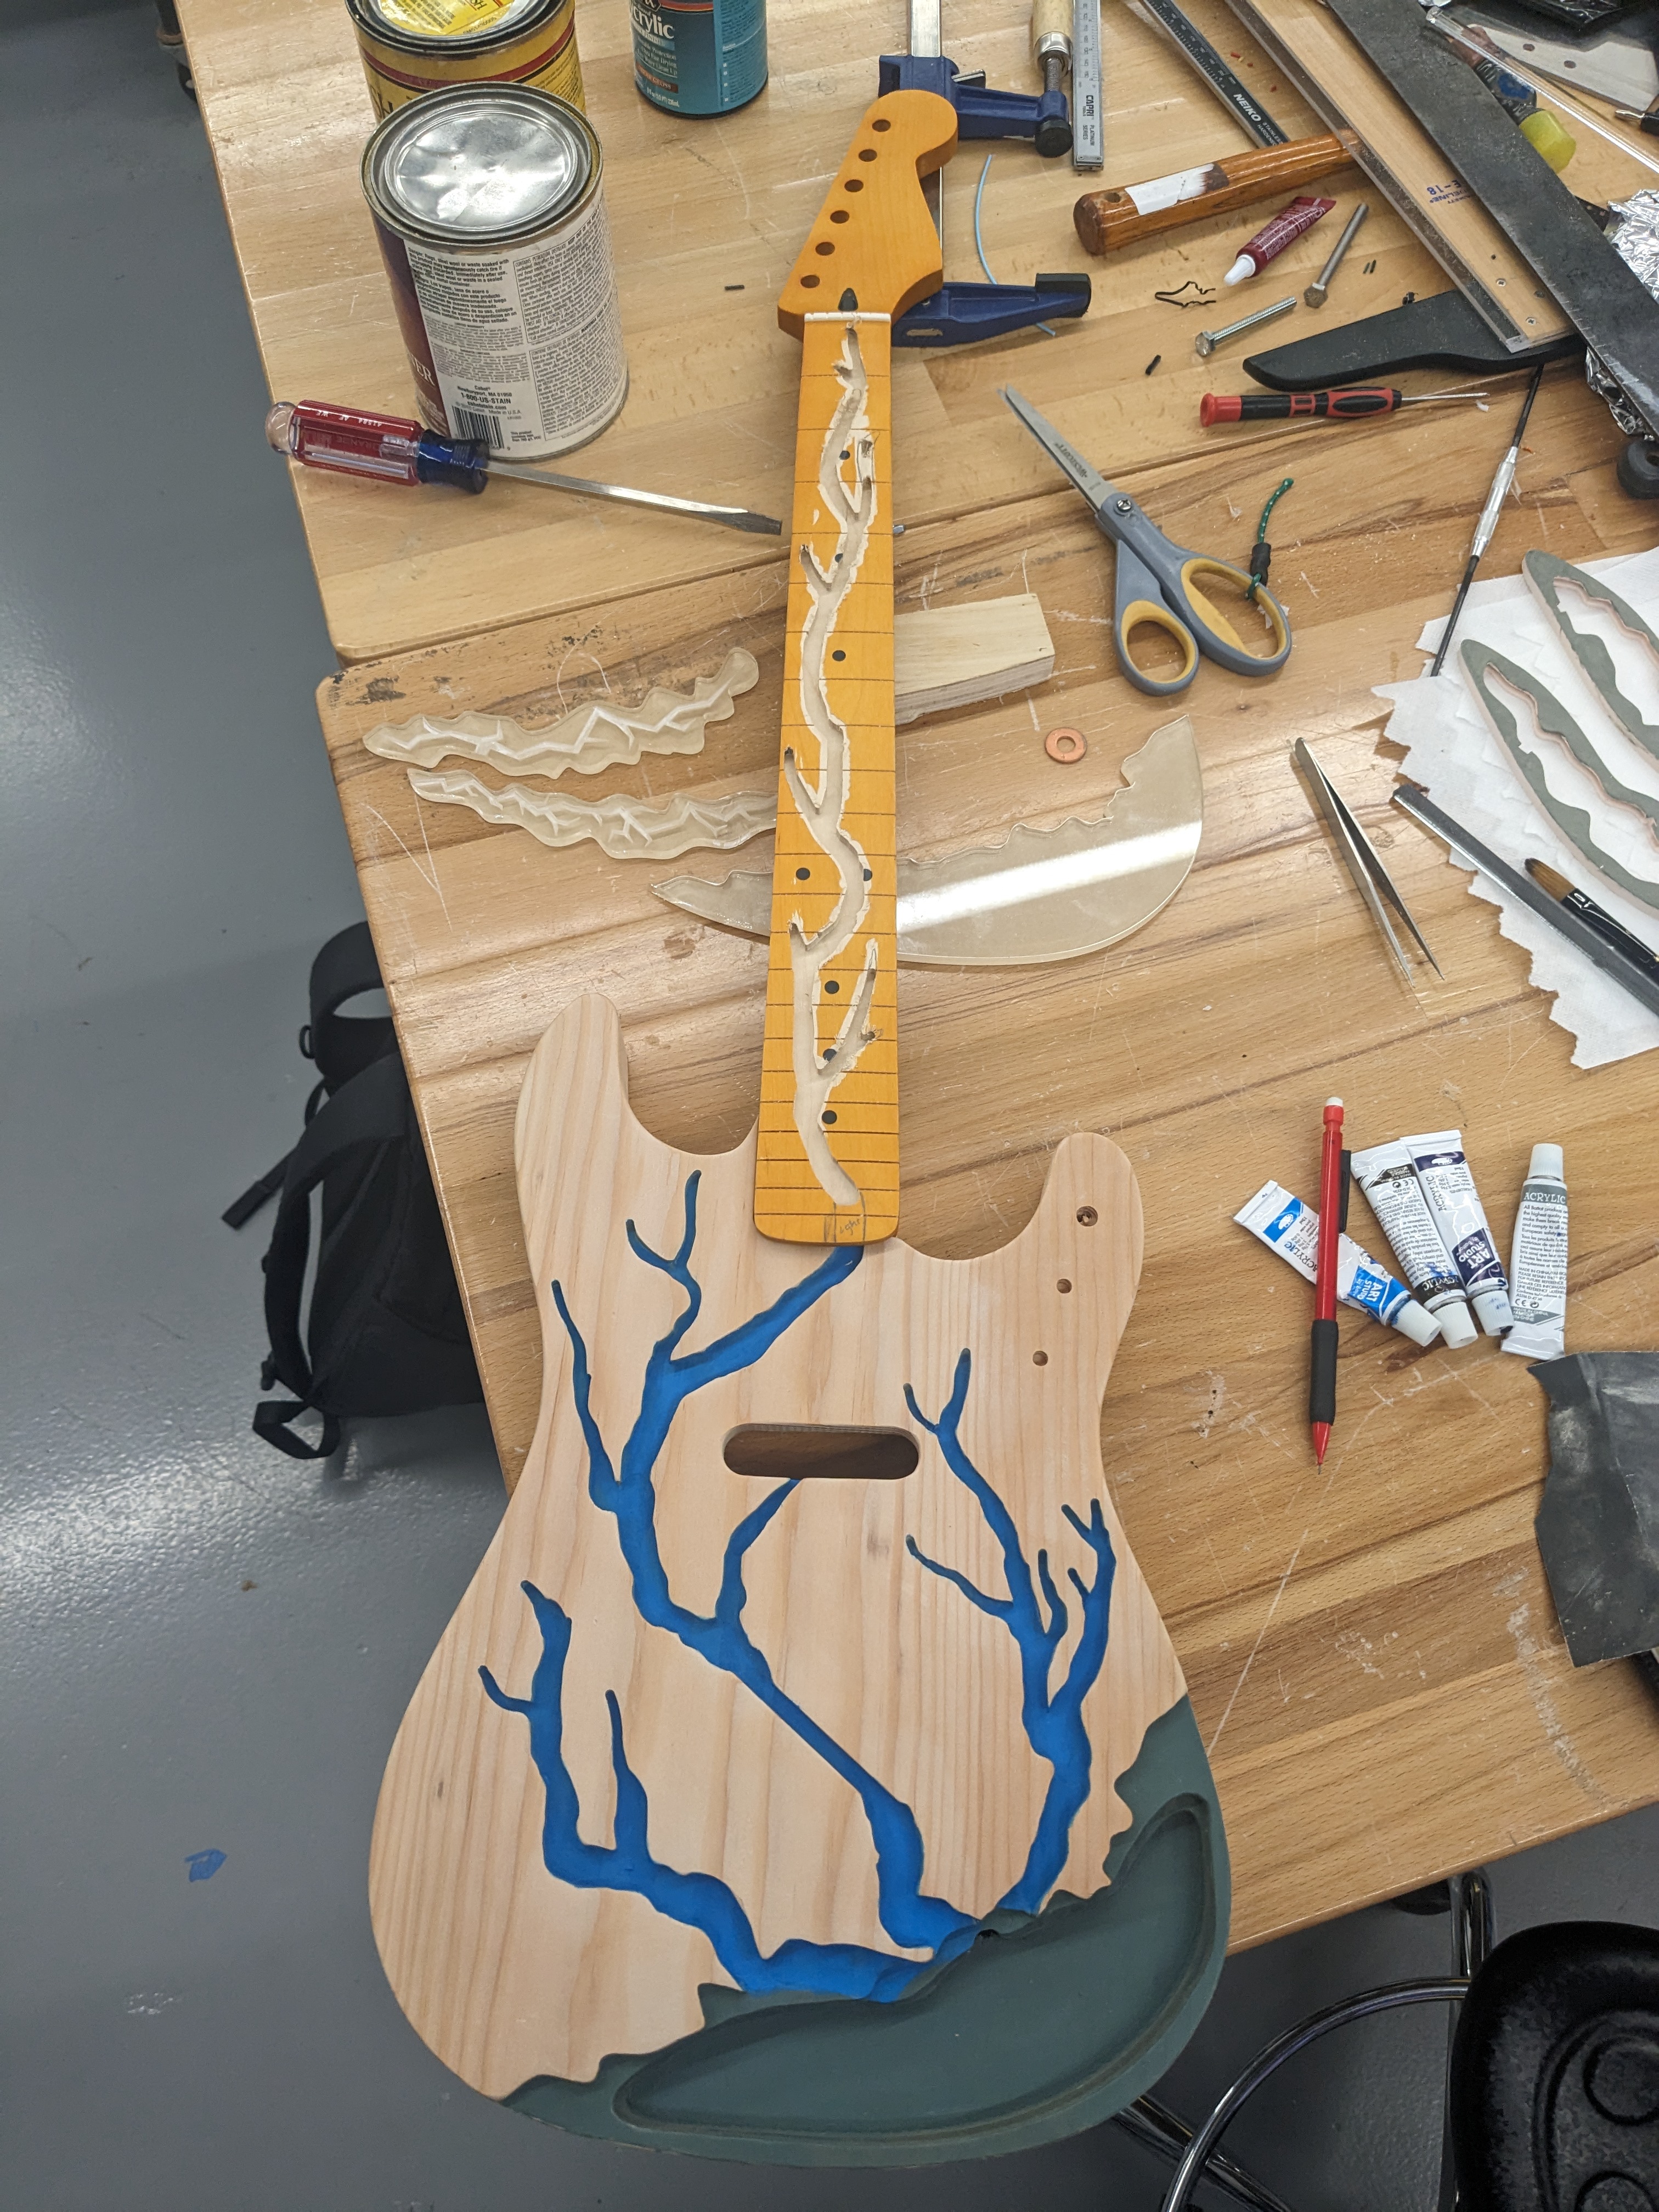
After the main design was made we had to CNC both the body and the neck of the guitar. The neck was the trickiest portion, as due to time constraints, we were not able to CAD the exact form of the neck(the only purchased part of the body). So we got the main geometry equivalent and had to make sure it was centered and level on the machine. Below are some pictures of the machining process.
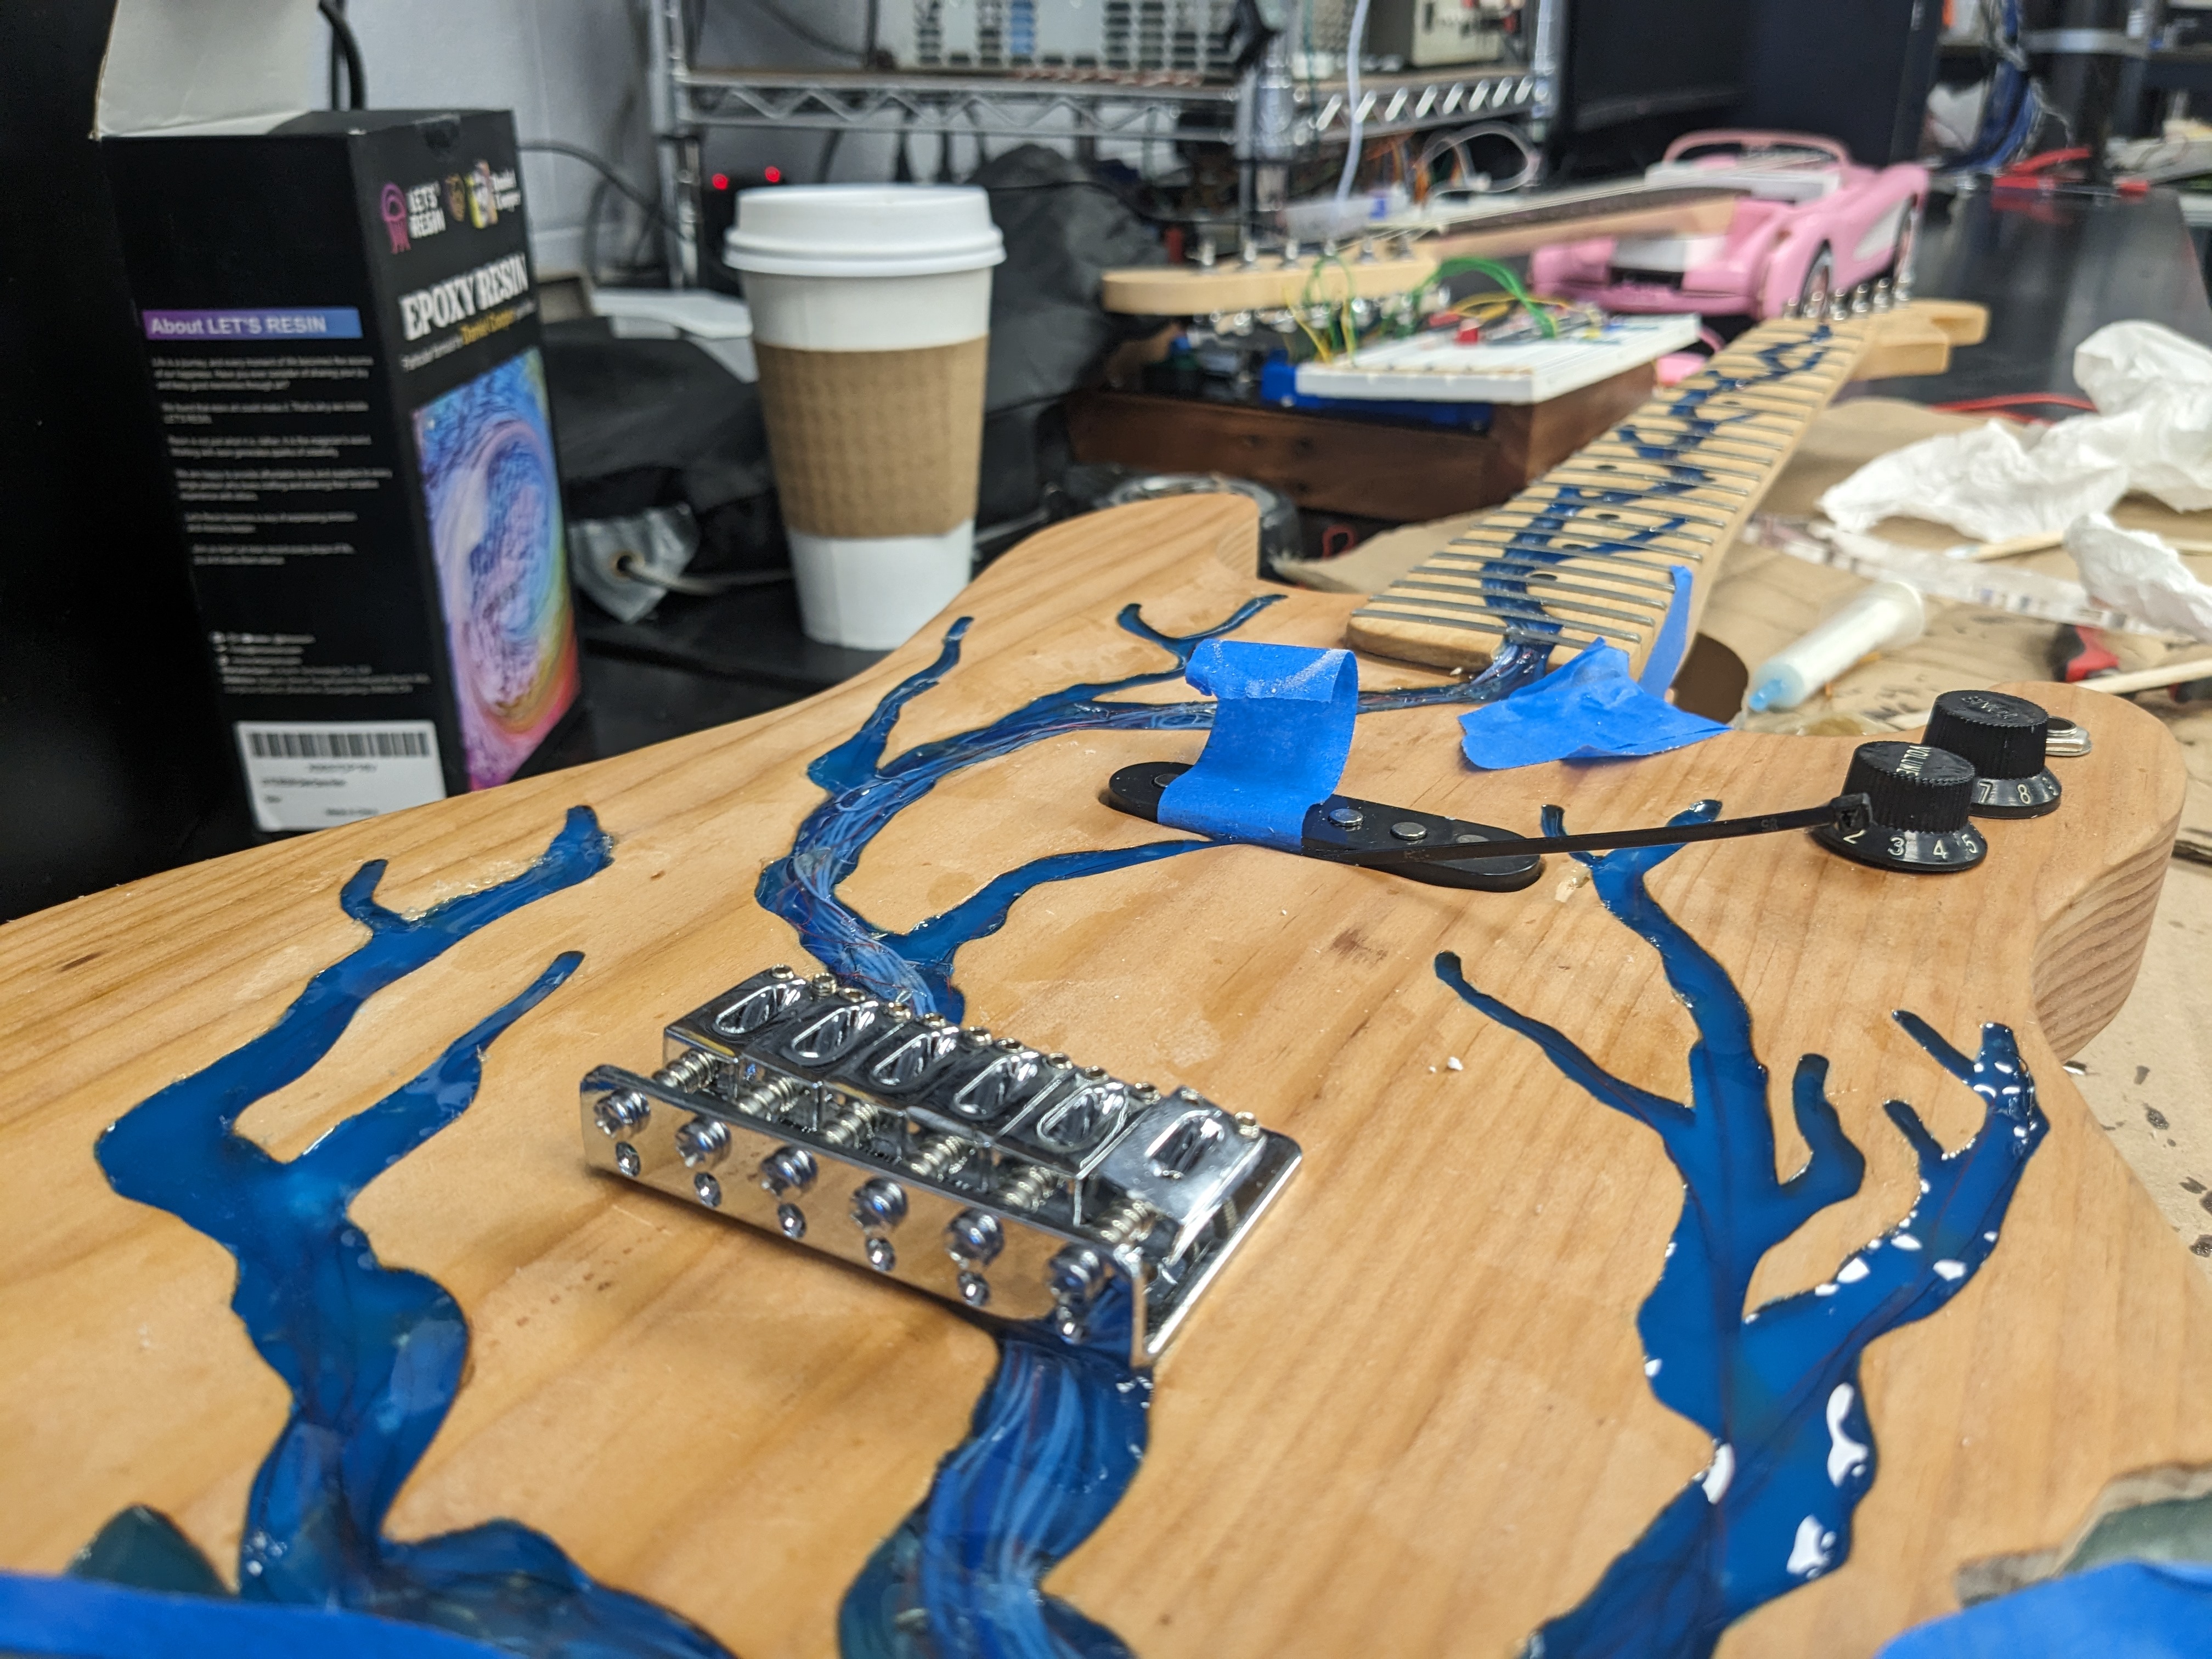
Detailing and Wiring
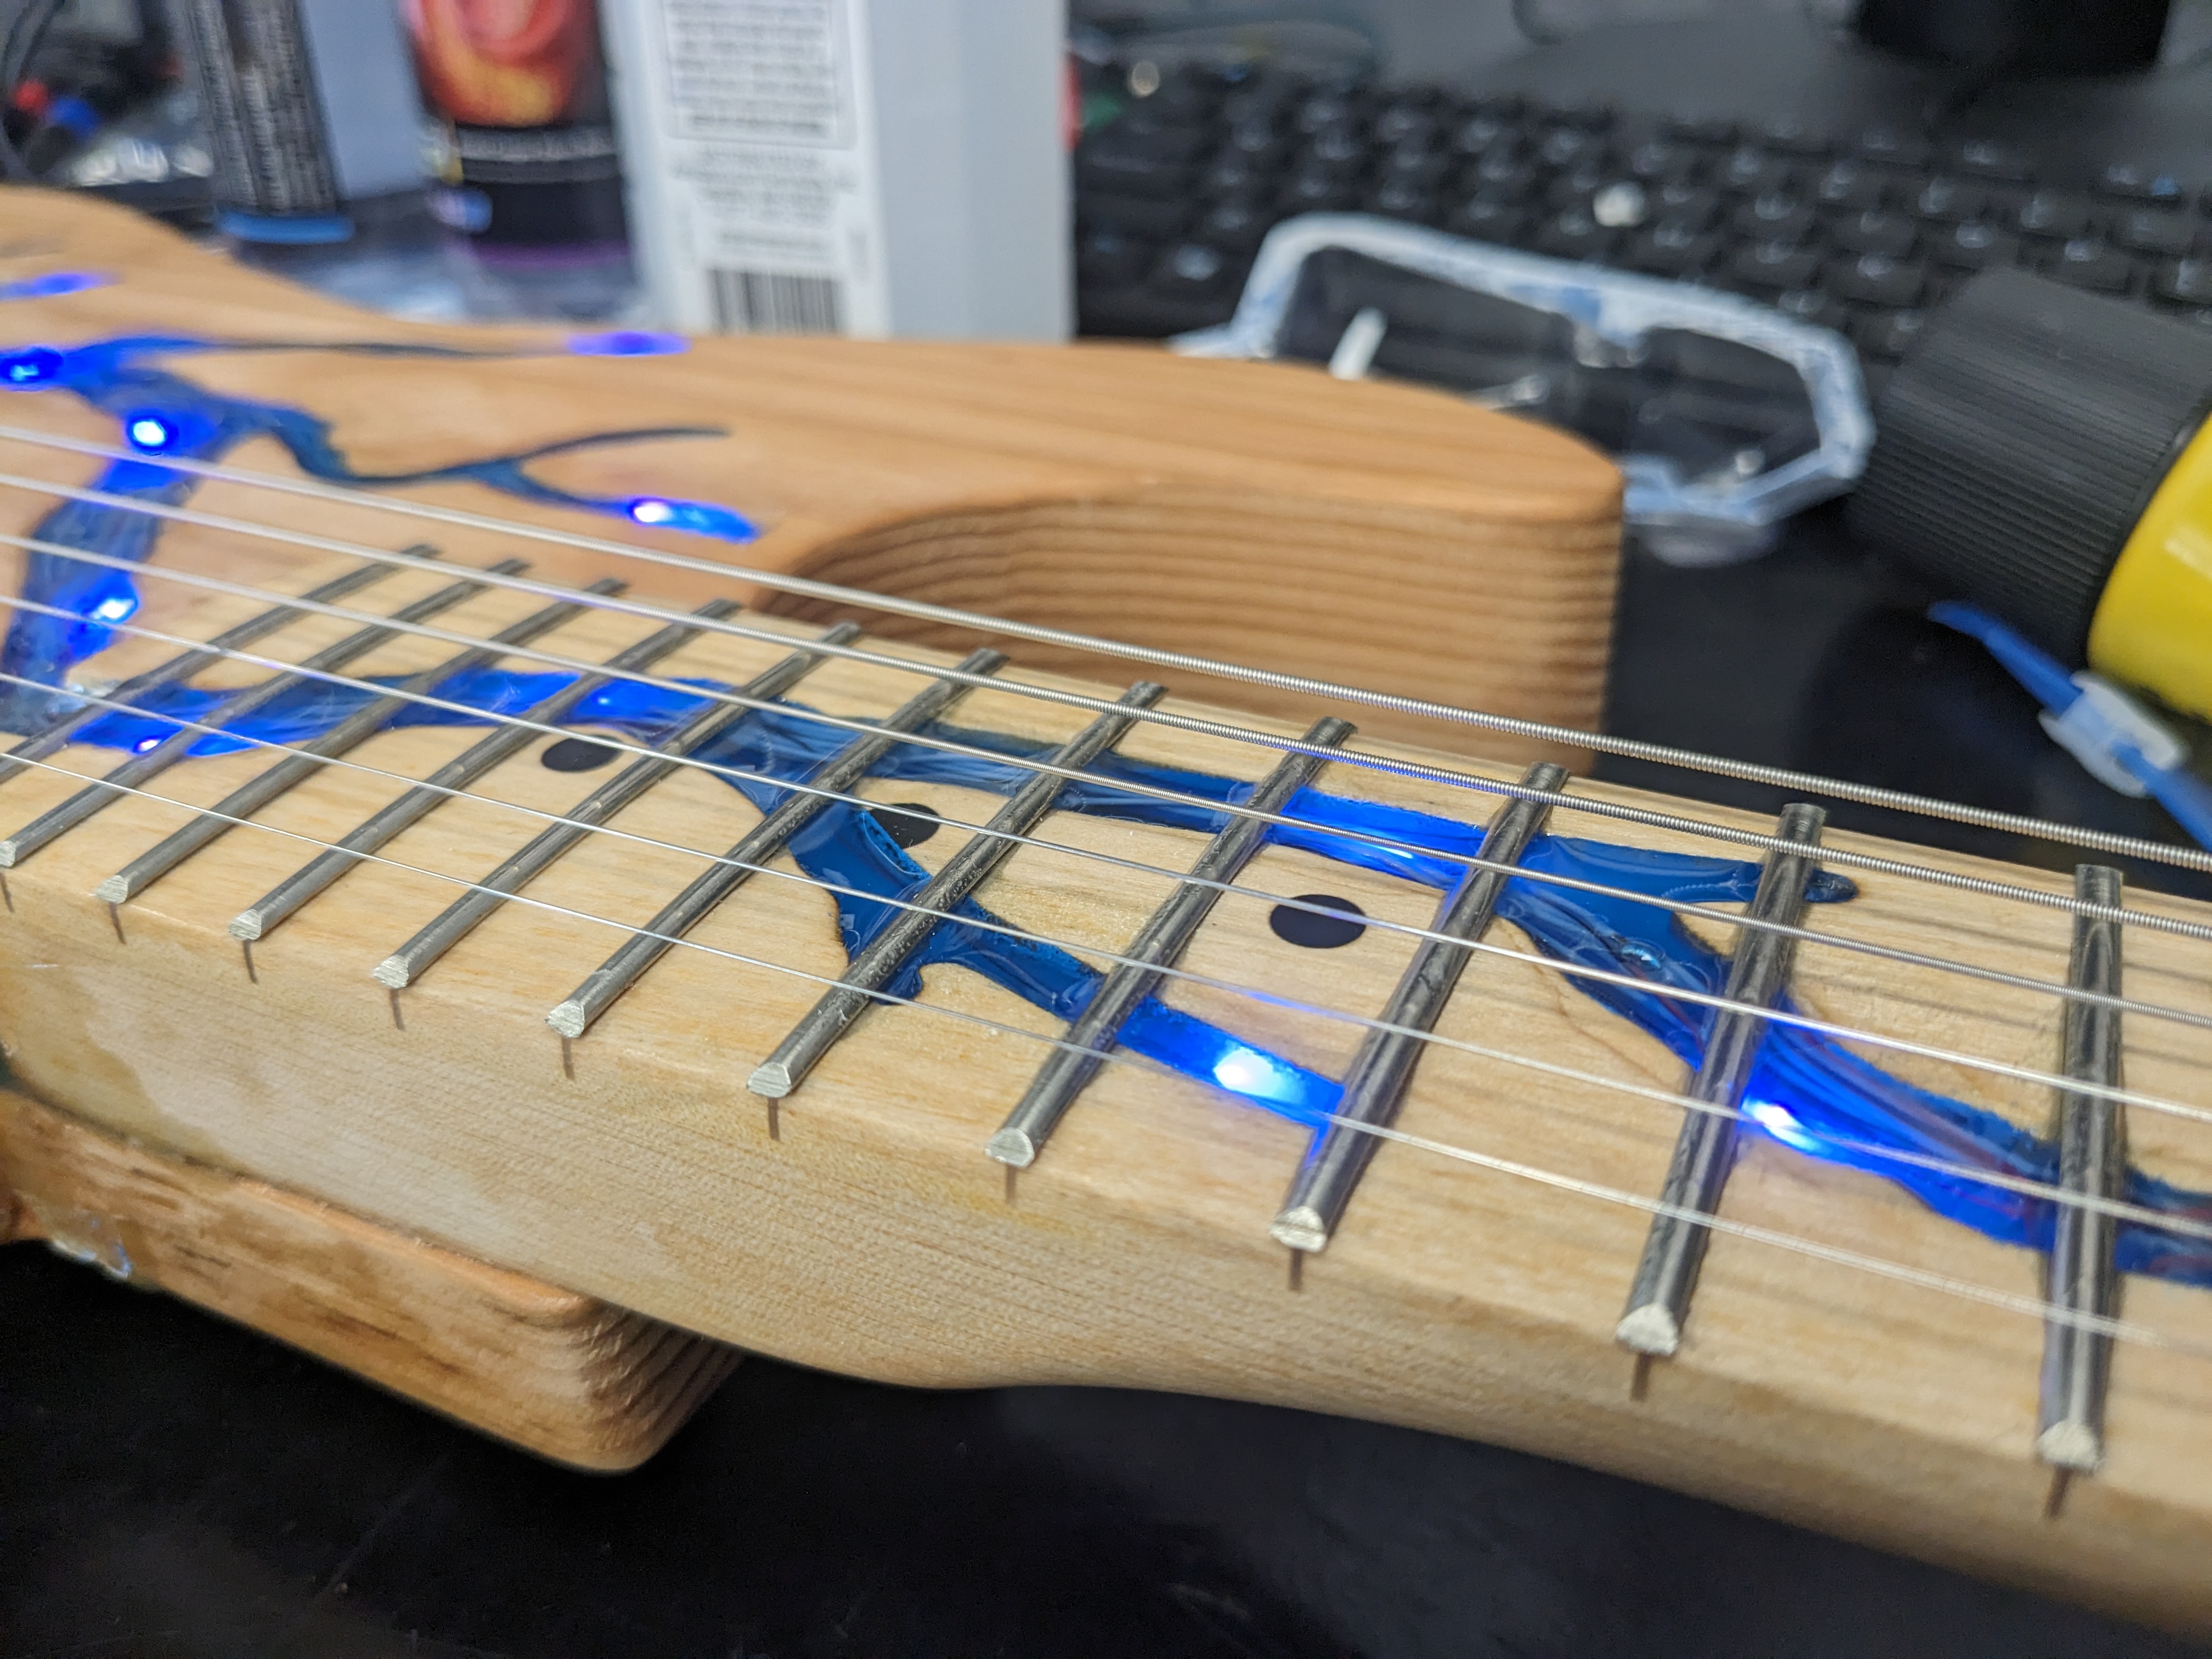
The trickiest part of this project was the wiring of the lights. Our initial idea involved having multiple stages of lights that went upwards along the neck of the guitar. We ended up using ten stages of different pockets of LED’s that lit up consecutively so that the lightning bolt had the effect of shooting out of the cloud and down the neck of the guitar. This lightning shooting effect would be controlled by a bandpass filter that came from the pickups by the string. If the amplitude of the vibration was over a certain point, meaning that a large strum or strong note was being played, the lightning would shoot out from the cloud. The wiring proved very difficult thought as we had to be careful about the current that was going through the LED’s and the very small wires we were using. We had to make sure that all of the wiring for each light would be able to fit inside the lightning cavity so that the epoxy could be flush with the fretboard. I am very much simplifying this process of wiring and setting up the electronics for the reading experience, however, this is definitely where a majority of the time on this project was spent.
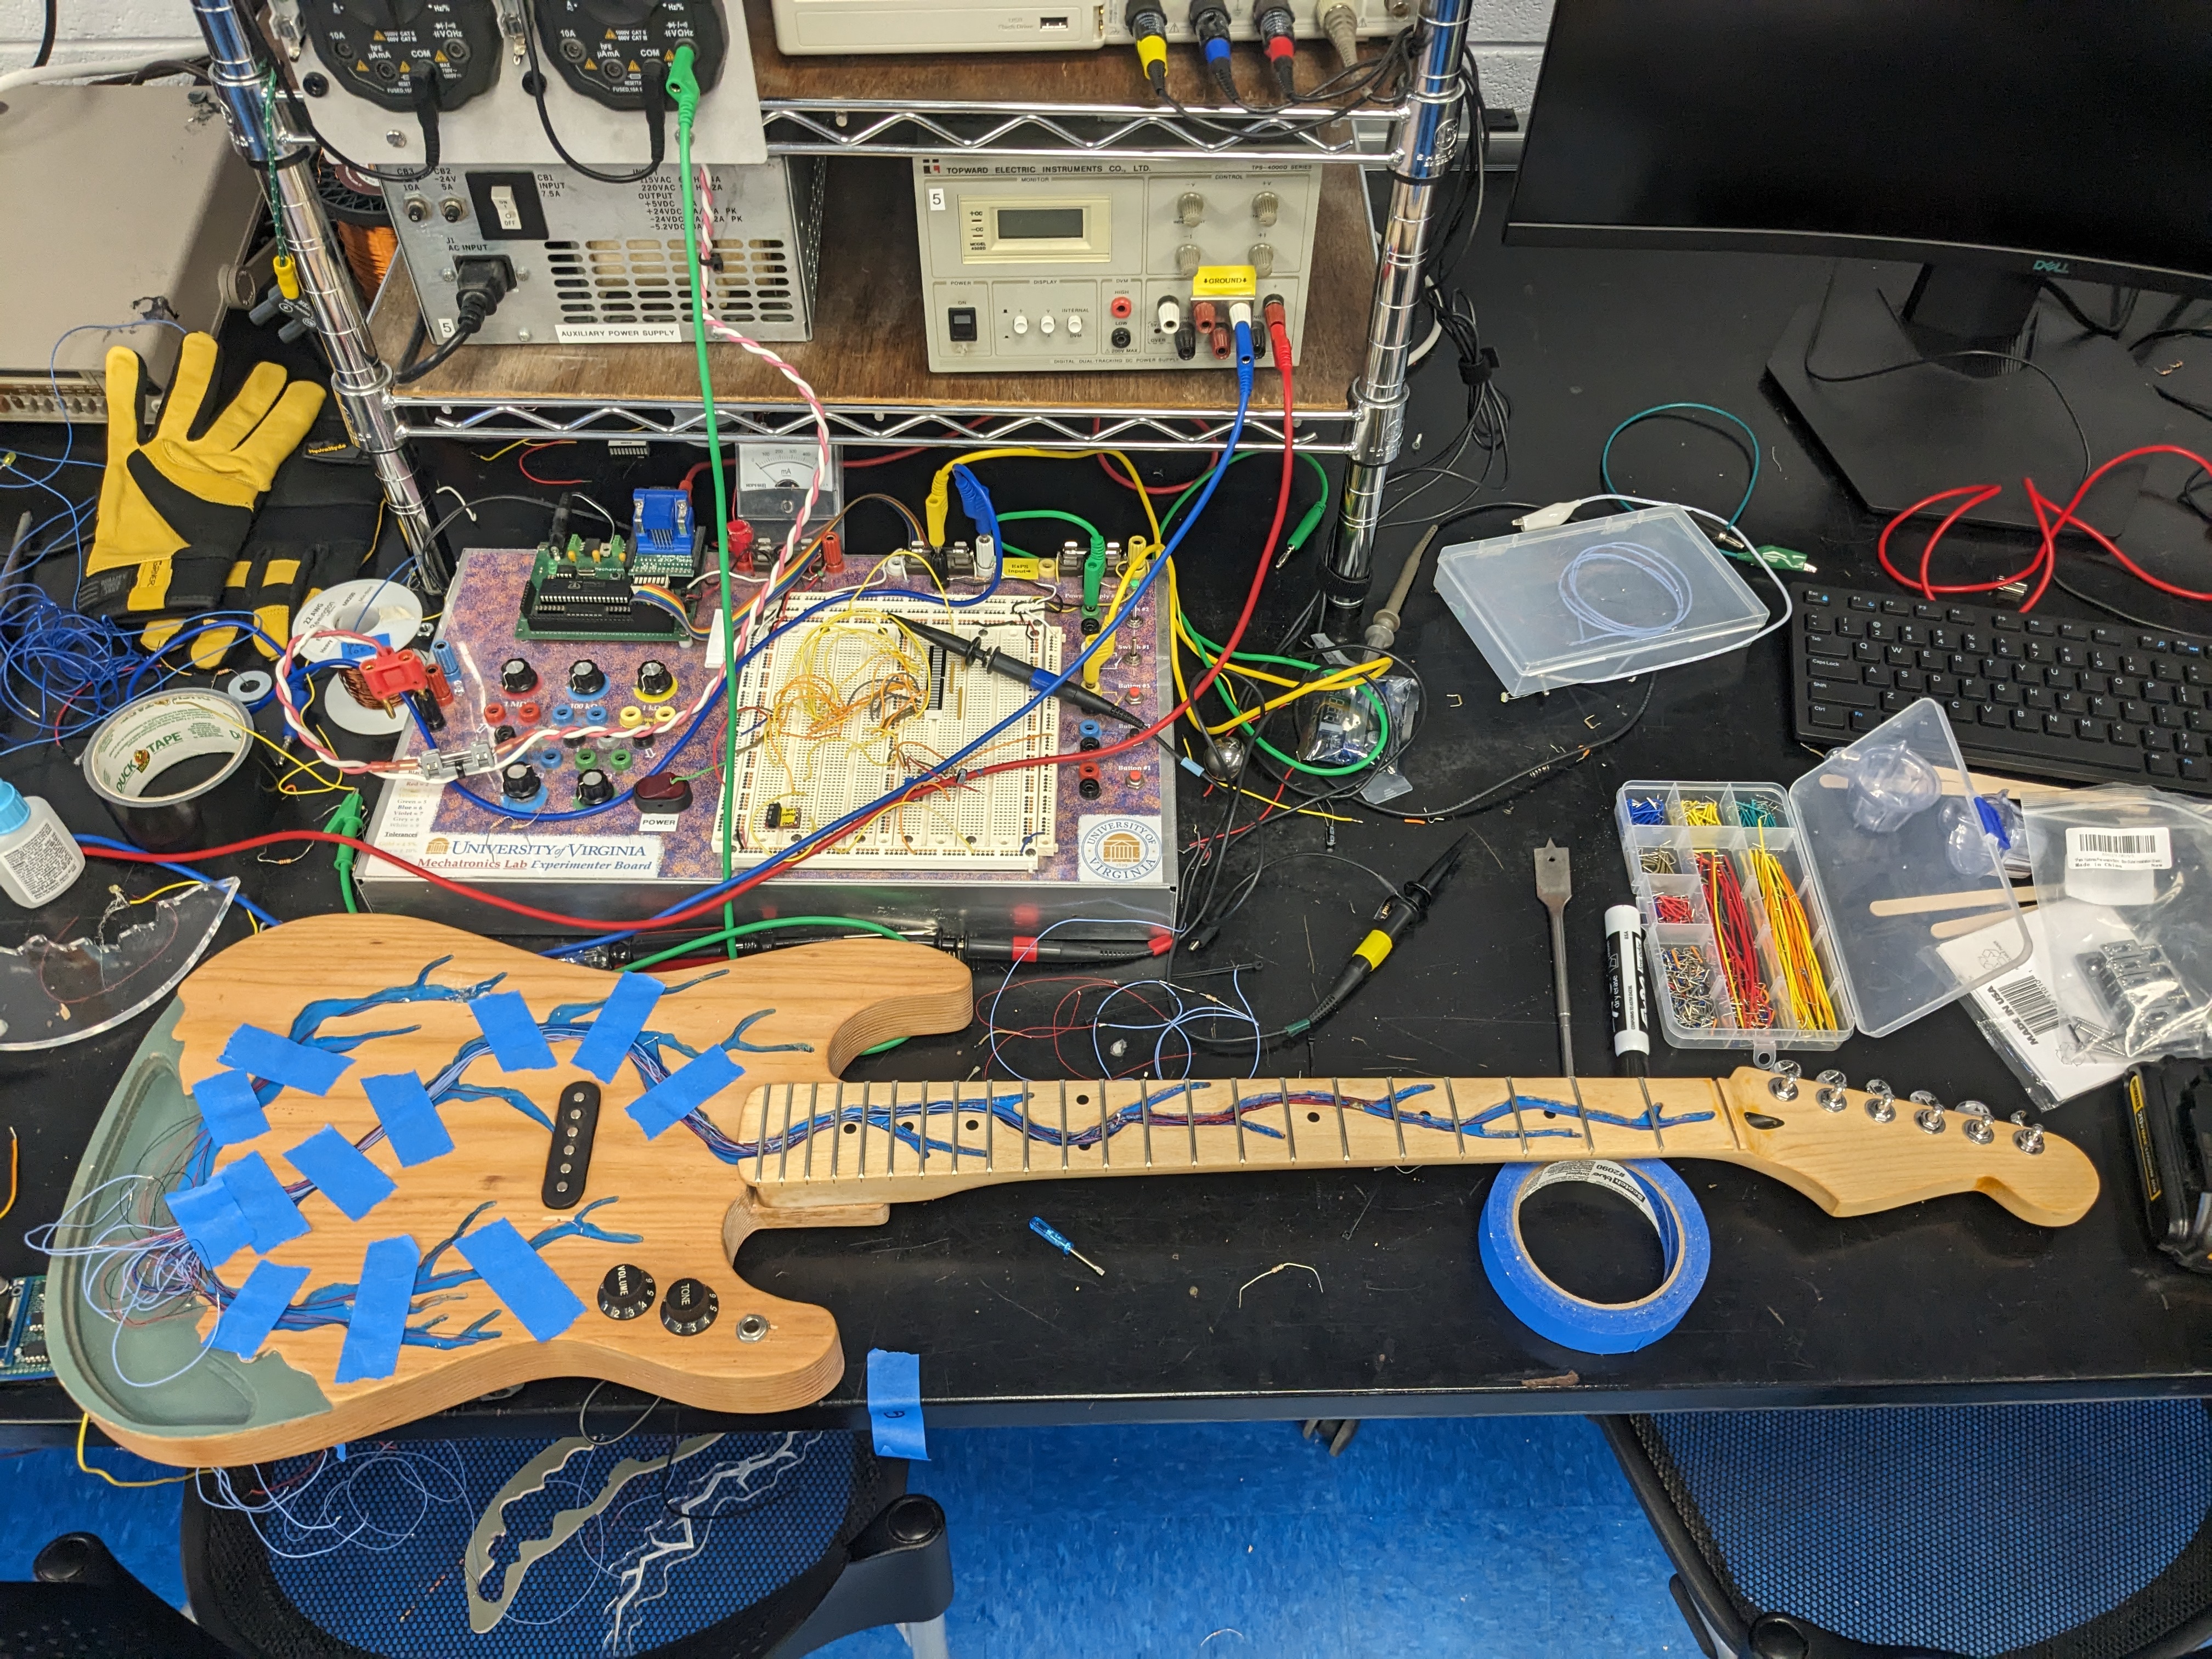
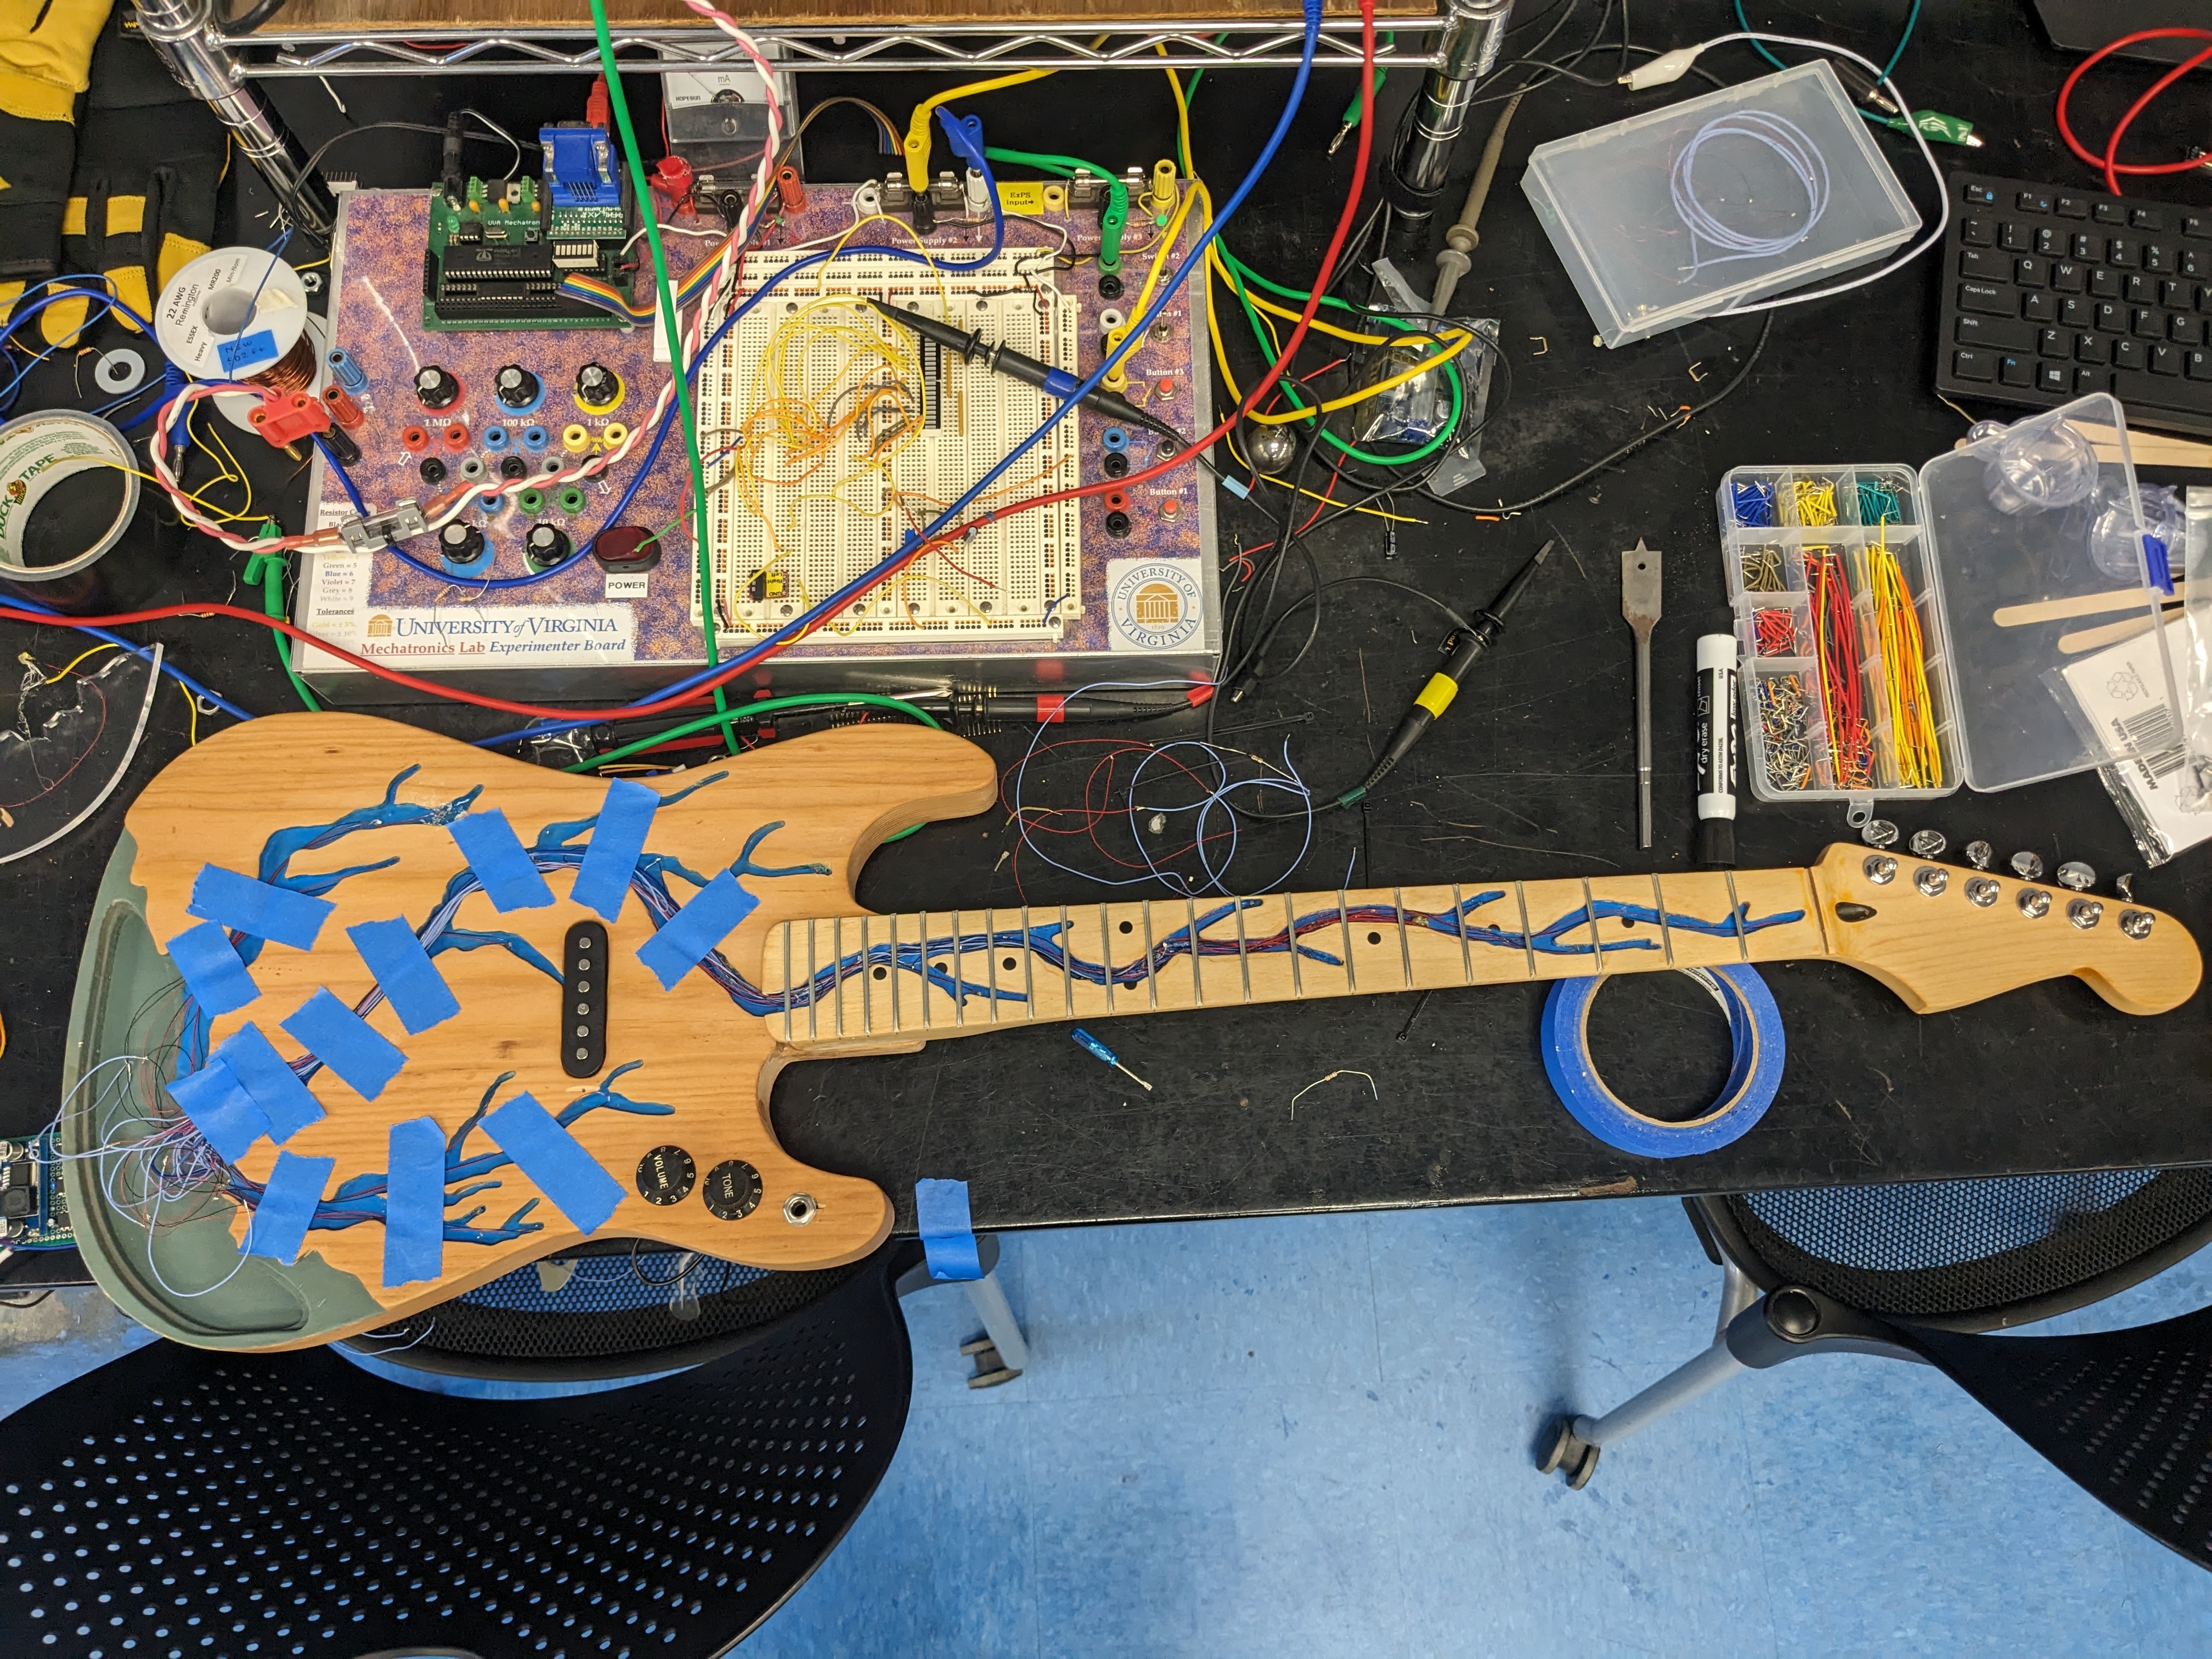
Additionally, we wanted the cloud to be treated as a separate entity so we made custom cutouts of clear acrylic that were etched with lightning patterns so that the electricity looked like it was moving through the cloud. There were also three layers of acrylic to imitate the depth of the cloud. These layers were surrounded on the edges and side-lit with bright white light that would randomly flash every 10 or so seconds like a thunderstorm crackling.
Custom Sound Effects Pedal
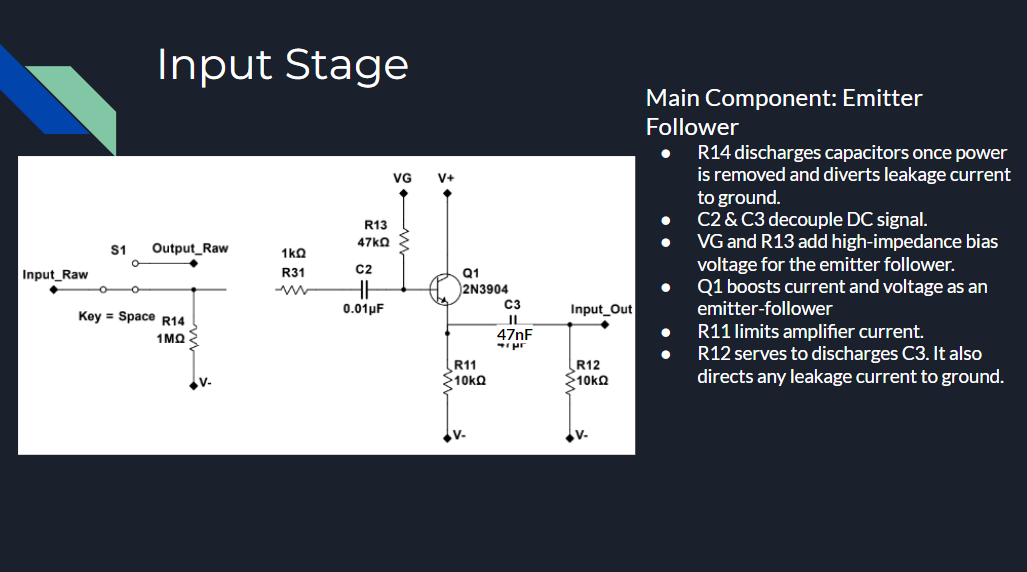
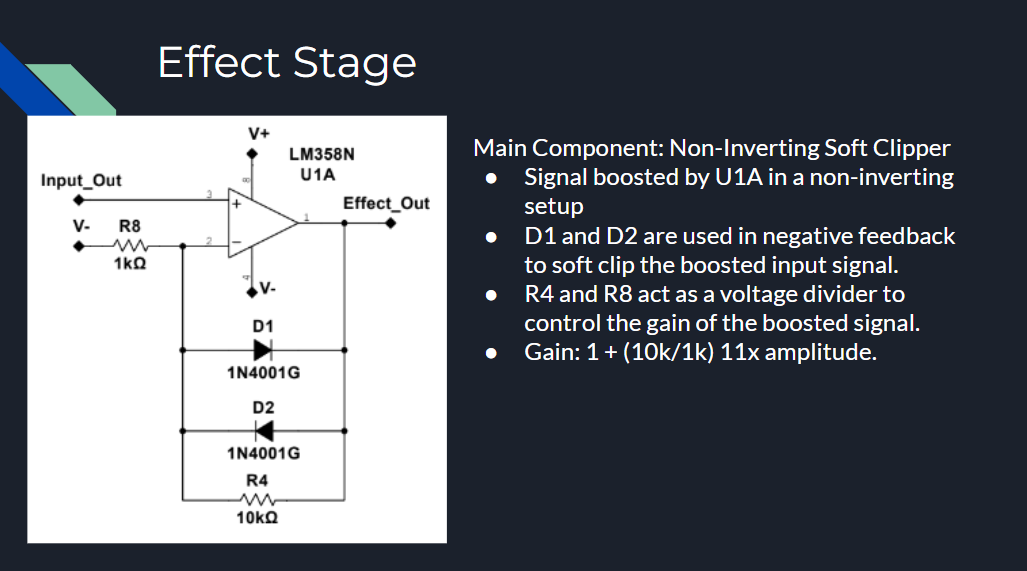
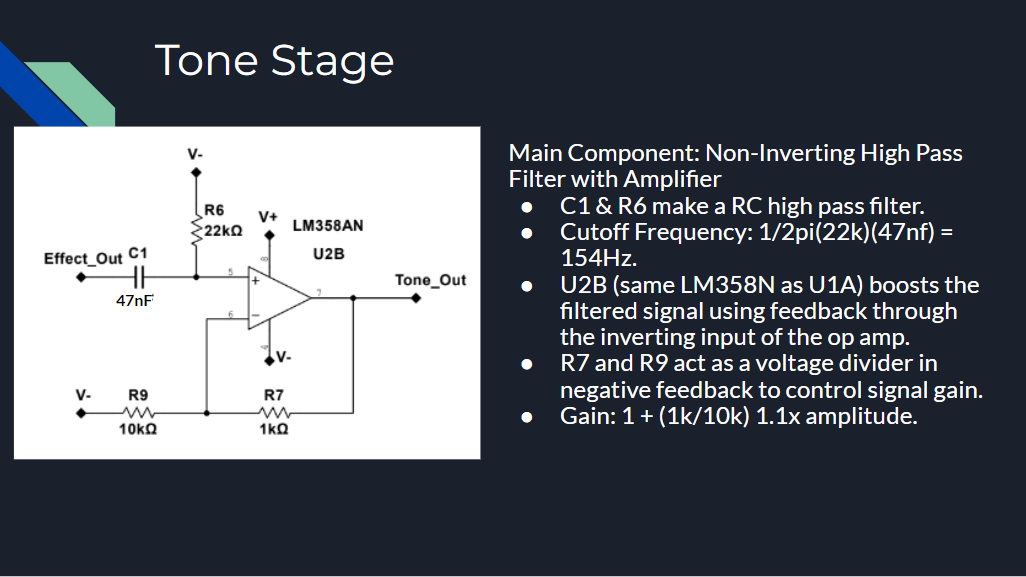
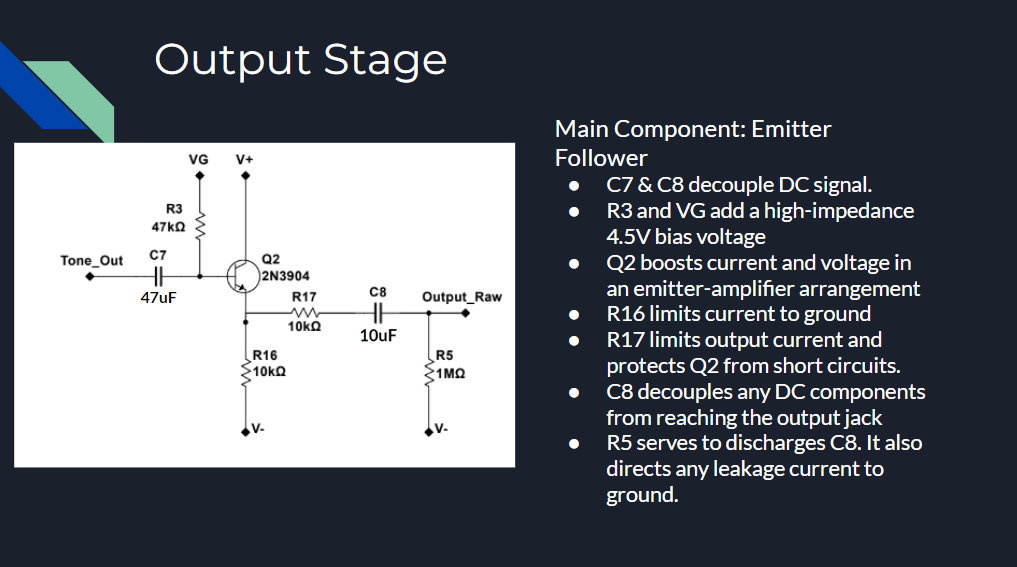
On the electronics side of things, we also learned how to distort sound and manipulate vibrational waves to change the way notes sounded. We called our custom effects pedal circuit the electrotremelo circuit as we designed it in such a way that it distorted the sound to be almost electric.
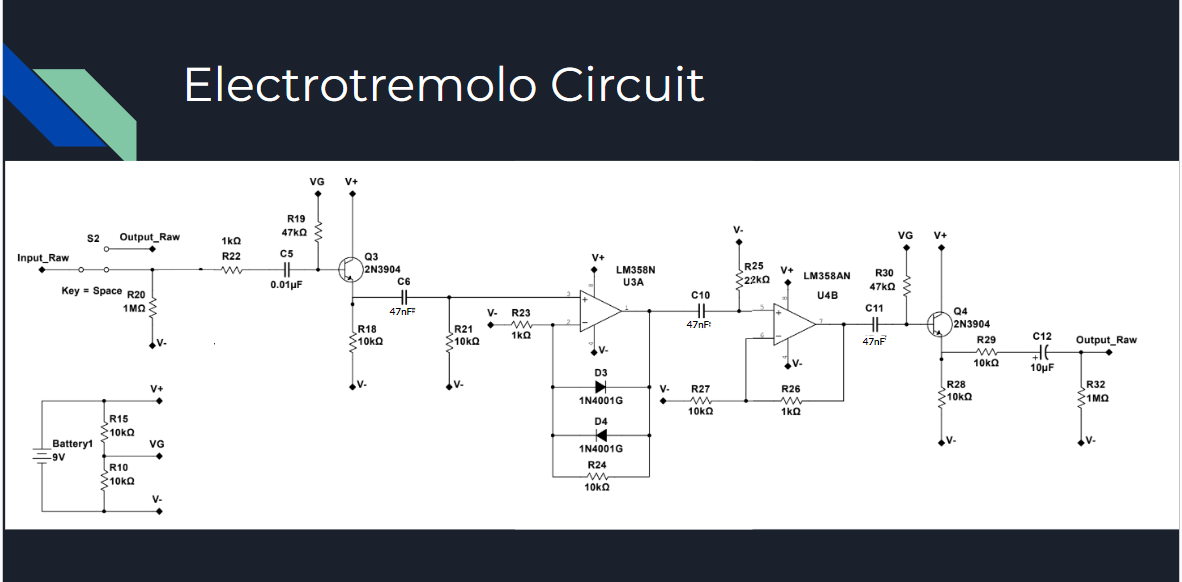
The circuit can be broken down into 4 different stages: the input stage, the effects stage, the tone stage, and the output stage shown below: