UVA Rodman Engineering Project
OVERVIEW
When my professor told all of his students that we were going to have to do work with an actual client and that he was open to suggestions I got very excited. I was inspired by the Assistive Technology (AT) work that I did in high school and wanted to continue this in college. After researching several potential clients, I reached out to the company Sportable which is based out of Richmond and focuses on making sports accessible for those with disabilities. Although I had never worked with them previously, they got back to me and were very interested in working together!
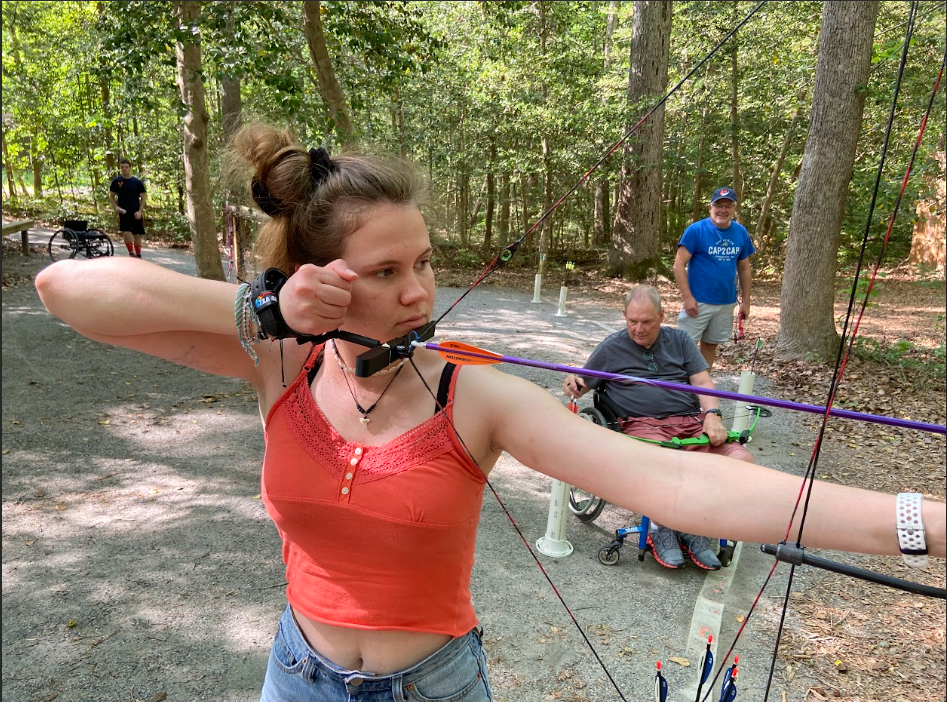
After setting this project up for the next semester I acted as the point of contact for my team of 5 other students while we worked on an adaptive archery project. This project was aimed at allowing those who have limited hand dexterity to fire a bow without the use of their fingers or other finer motor skills.
Trigger Mechanism
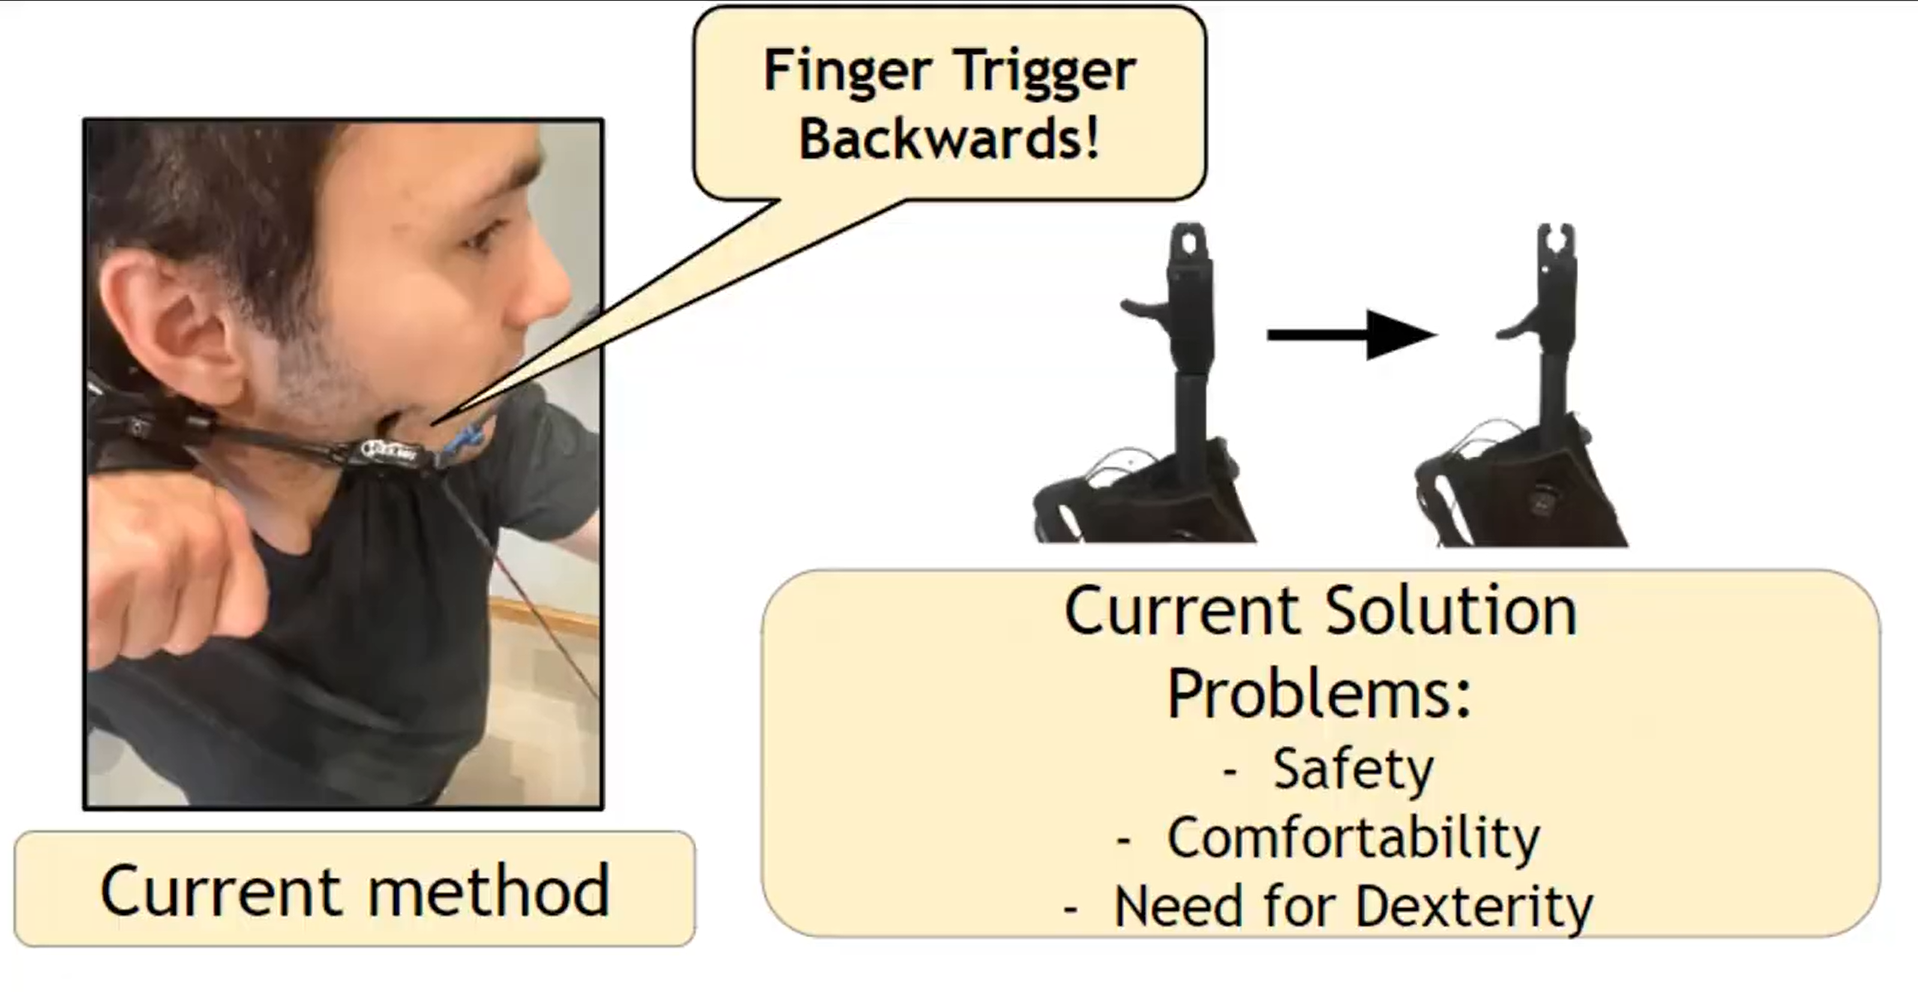
Current method:
AT Trigger Design:
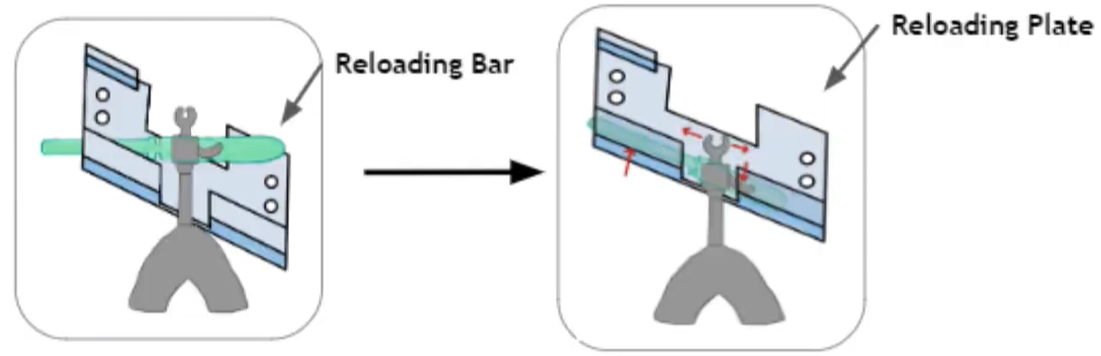
Reloading Plate:
The final project was able to be tested with users and a summary video can be seen here
How did We Explore?
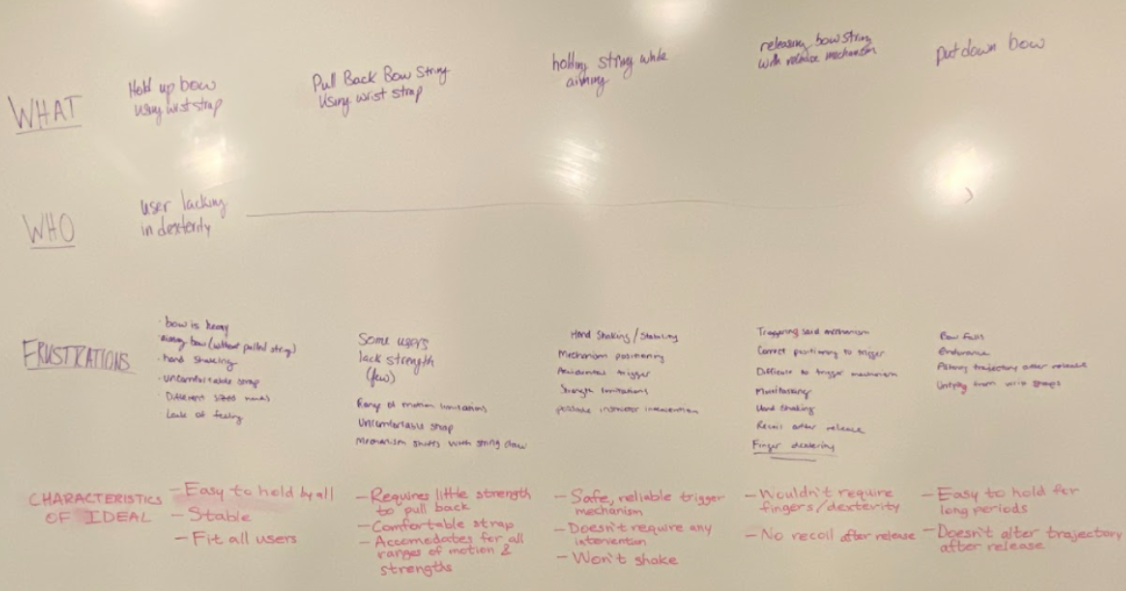
Gaining User Insights:
We learned that finger dexterity is not the only user challenge – lack of strength, an uncomfortable strap, & unsteady trigger are also issues we must also address in design.
Gaining Insights from Personal Experience: We got to test out the equipment (we went to Rockwood Nature Center in Richmond on 2/24) and experienced the difficulties ourselves. The current technique involved using a finger trigger, but backward & on the face. We noticed that it was difficult to move your head backward while also drawing the string backward. This gave us an idea of what might help - a release motion going in the opposite direction, in other words, the release triggering with a head moving forward instead of backward. This motion would make the bow release feel more natural AND comfortable. Going there ourselves and testing out the way that the trigger was currently used by the athletes allowed us to draw our own conclusions and broaden our brainstorming without relying solely on the client.
The next thing we did was brainstorm our FUNCTIONAL REQUIREMENTS:
- Be usable without finger dexterity - Finger dexterity is a major challenge for our target user
- Be safe - Doesn’t injure the user
- Be consistent - Allows for the development of a learnable skill
- Be comfortable
- Be secure
- Be durable
- Be stable - Reduces variability while aiming
- Be lightweight - Reduces exhaustion during use
- Be usable by different people
- Different hand sizes, body types, disabilities, etc.
- Modifiable/adjustable
- Be widely accessible & obtainable
- Be financially affordable
- Be able to be used on different bows
- Be intuitive
- Be visually unintimidating
- Stay open until closed manually
These allowed us to have a focused, open-ended brainstorming session:
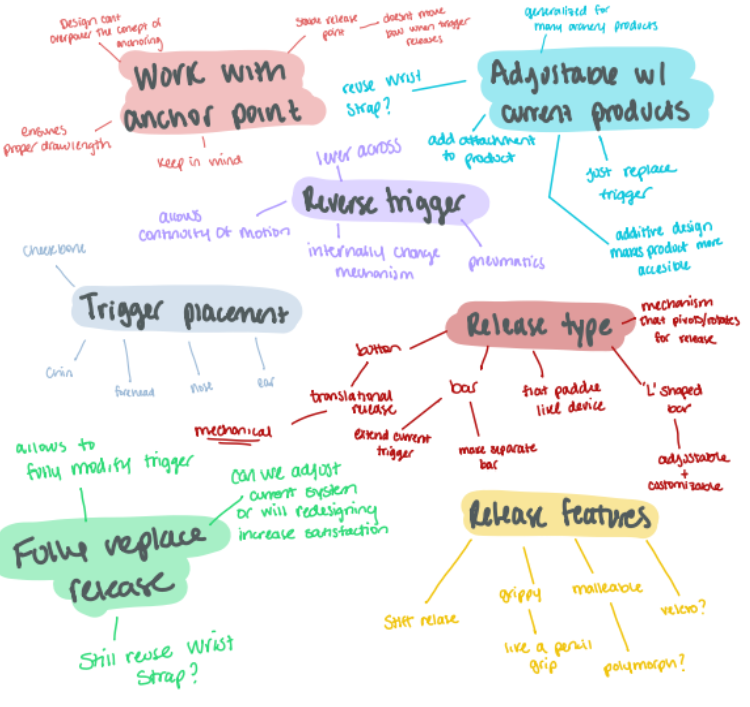
I took a lot of these brainstorming and design techniques from the work that I used to do in robotics as Mechanical Fabrication lead From this initial brainstorming session, several obvious design paths began to emerge. We were able to create general groups of different concept paths to further explore, some of which we were able to eliminate through just ideation without needing to create physical prototypes.
Design Paths

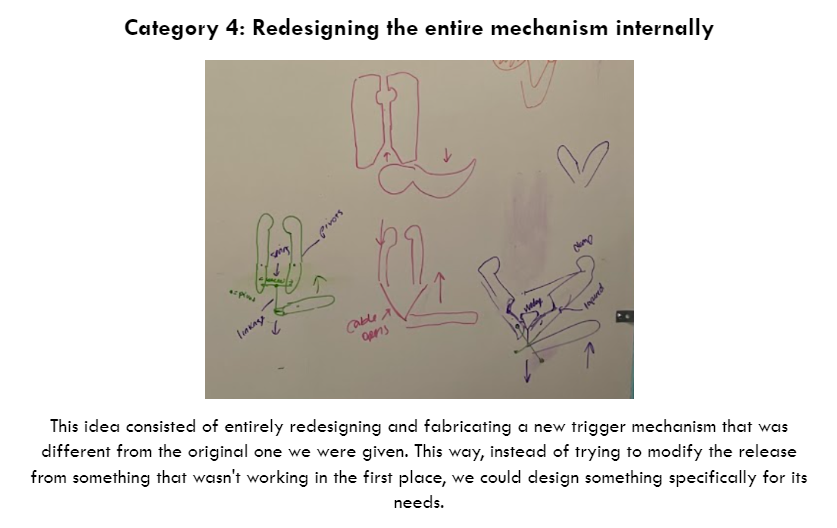
Ultimately, we did not decide to pursue this last solution path because of:
- Safety concerns about our mechanism being able to withstand the force of the bowstring under tension (10-50 lbs of force)
- By using the current trigger we already have a mechanism free of safety concerns to do this
- A lack of sufficient time to design a whole new, complicated mechanism
- Difficulty in designing complex internal geometry
- It was hard to even conceptualize this geometry when we were drawing on the whiteboard
- It is more expensive to design a whole new product
- Less accessible than something 3d printed
- Less feasible given general constraints regarding budget, proximity to the client for testing, etc.
- Simplicity is key i.e. don’t fix something that’s not broken
- ONE OF THE MAIN GOALS WE ORIGINALLY DEFINED WAS ACCESSIBILITY
This was a huge decision that majorly helped us narrow down our solution direction - after this, we decided that we would be focused on modifying the current trigger mechanism instead of completely redesigning it
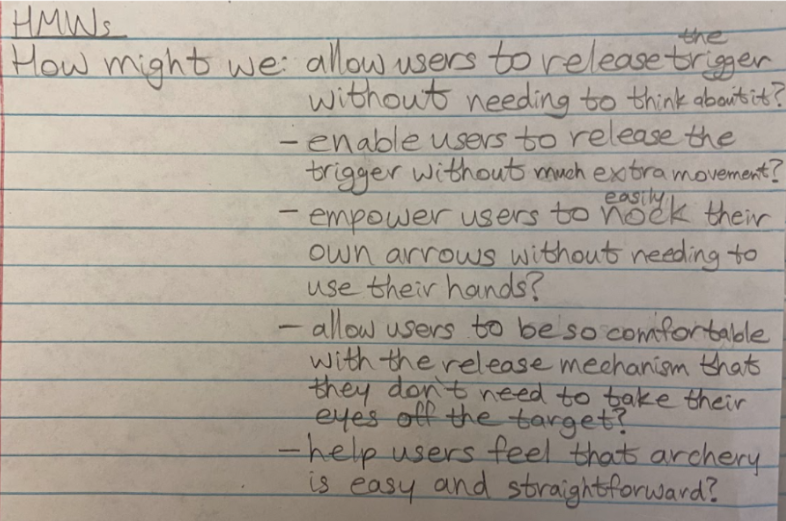
Next, we looked at the different How Might We’s to help us center our focus and goals for the design:
Evaluation and Prototyping
Prototyping - What Ideas did We Explore?
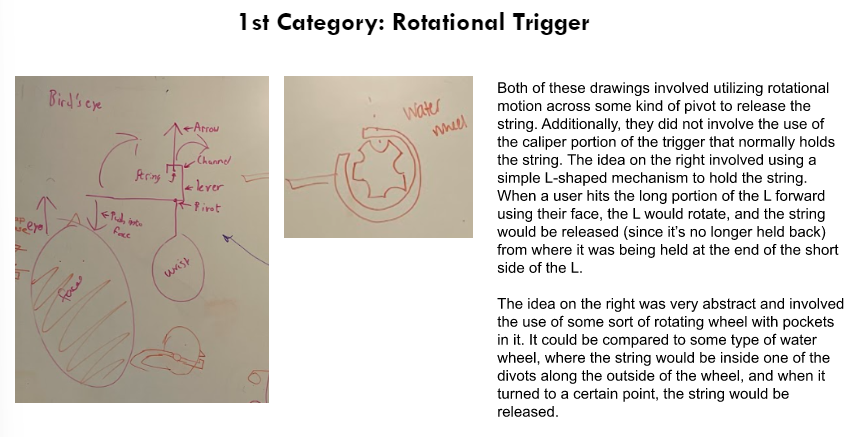
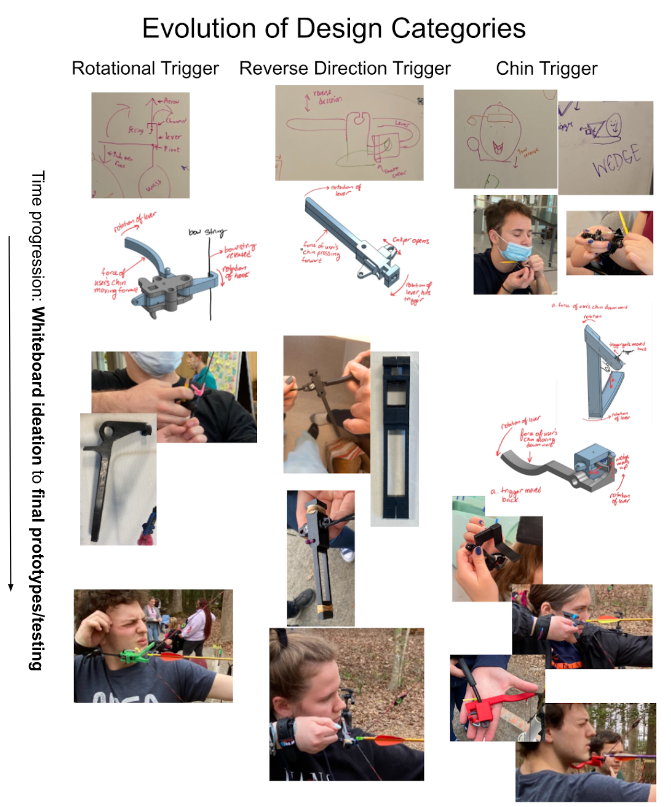
- Category 1: Rotational trigger
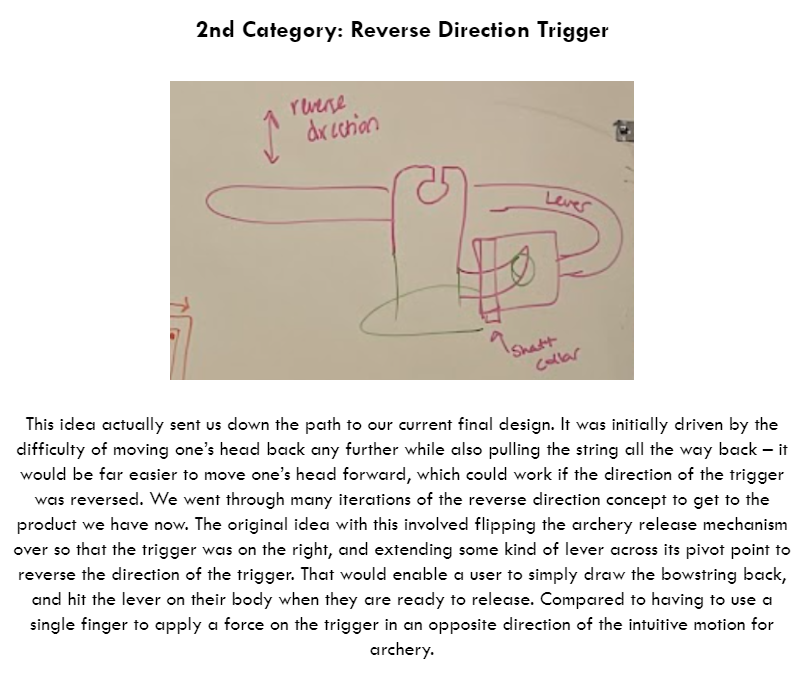
- Category 2: Reverse direction trigger
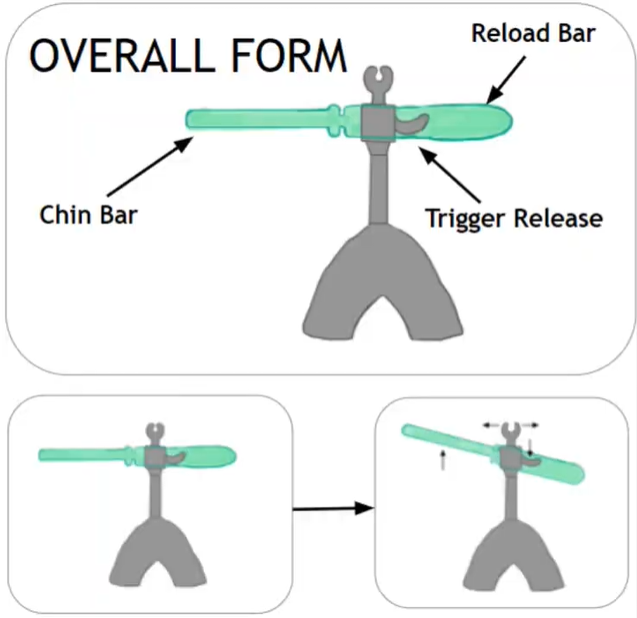
- Category 3: Chin release
- As we began exploring these ideas further, we came up with an idea to use the chin’s downward movement to release the string instead of applying forward force with the face i.e. Opening the mouth and hitting a lever under the chin.
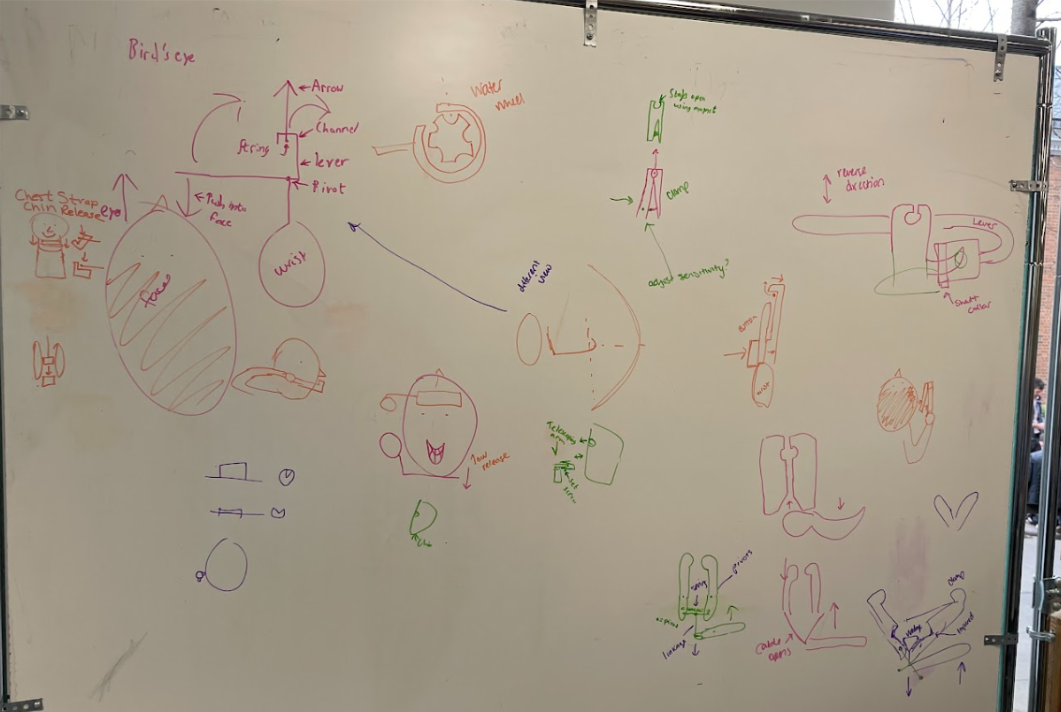
Process:
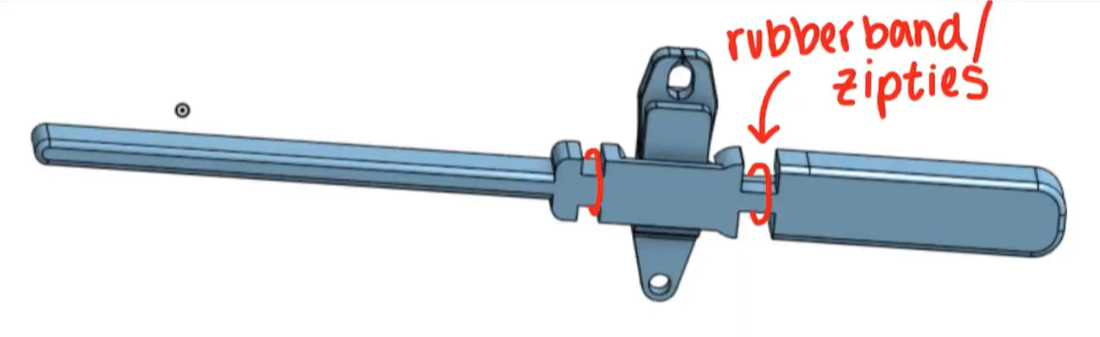
- We first created whiteboard sketches, then further developed the most promising designs through CAD drawings, lo-fi prototypes, and finally 3D printed prototypes that were physically tested. This process is shown below.
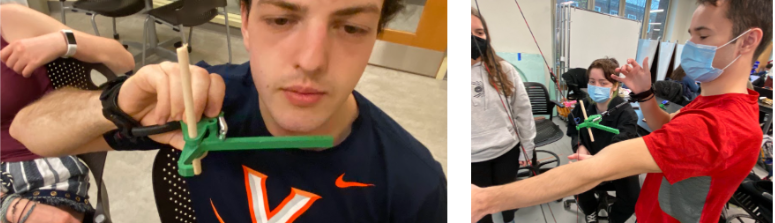
Evaluation Methods - How Did We Evaluate Our Ideas? Testing without & with Bow in Class - This testing process showed us how the motion of releasing the trigger varied when releasing under tension and actual shooting conditions as opposed to testing the designs while they held nothing. This helped develop an idea of which designs would be the most viable to pursue.
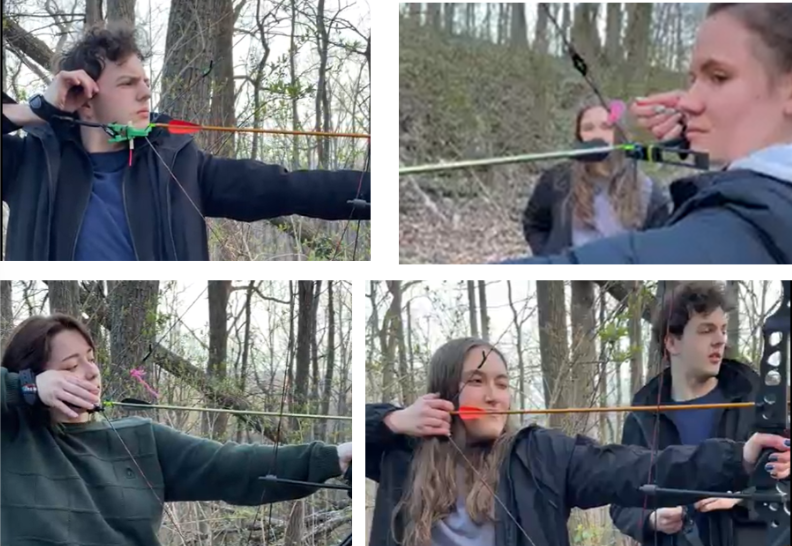
Testing with Arrows & Bow - This testing process gave us actual experience in how our product may be used, allowing us to test how accurate and precise our designs were. - Actually see how safe each design is to use in a more realistic situation/most realistic use.
How & why we chose the final design (Reverse Direction Trigger):
- Reverse Direction Trigger
- Pros: Simple mechanism, Safe, Easy to design, Didn’t involve complex CAD geometry, Utilized already existing components of the trigger
- Cons: Couldn’t adapt to all triggers, couldn’t easily load arrow
- Bottom Line: Simple & Safe, but Not Easy to Load Arrow
- Rotational Trigger
- Pros: Simple mechanism, Could adapt to all triggers, Easy to load arrow
- Cons: Not safe enough (all force was on thin plastic piece), needed lots of forward motion to release
- Bottom Line: Simple & Easy to Load Arrow, but not Safe
- Chin Trigger
- Pros: Not much extra motion required to release, Safe
- Cons: Trigger was under neck rather than chin for some people, making it difficult to release, Complex to put together
- Bottom Line: Safe, but not Simple to put together
Overall, we decided to choose the Reverse Direction Trigger since safety (eliminated Rotational Trigger) and simplicity (eliminated Chin Trigger) were our top priorities – this was the only design that had both.
While the rotational trigger made it much easier to load the arrows into the trigger, the safety was not up to par and the only way to fix this was to make it out of a stronger material through a more complex machining process (making it less accessible to all users). Therefore, we decided to go with the Reverse Direction Trigger while developing a mechanism to allow it to fit all wrist calipers.